Processing a Special Payroll Run with the Individual Time Entry Screen
How to process a Special with the Individual Time Entry screen.
*Before processing, please be sure the Special Run has been set up by Support.
1. Navigate to the Individual Time Entry screen (Payroll Processing > Payroll Entry > Individual Time Entry) and select your employee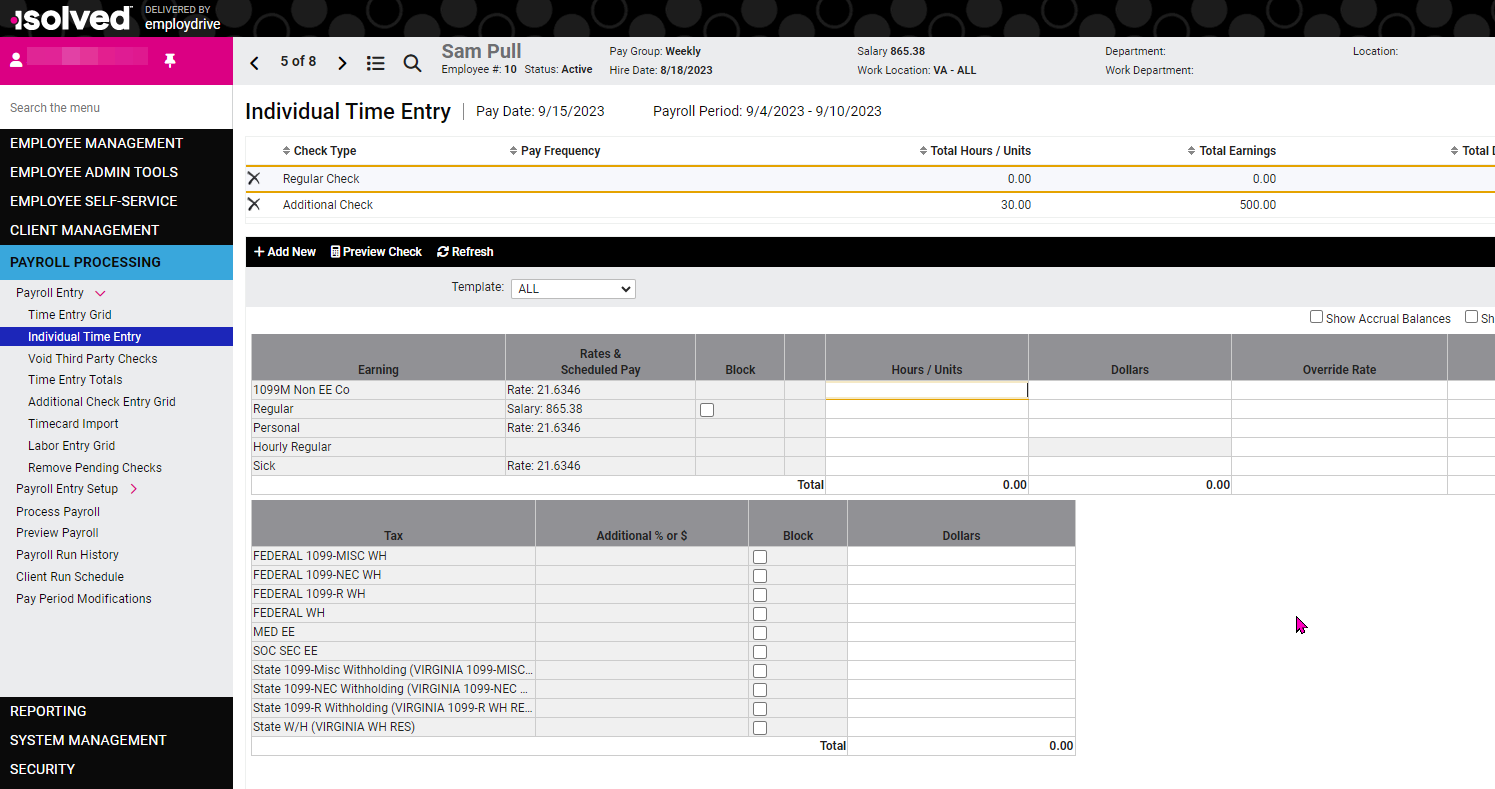
2. Click Add New on the black action bar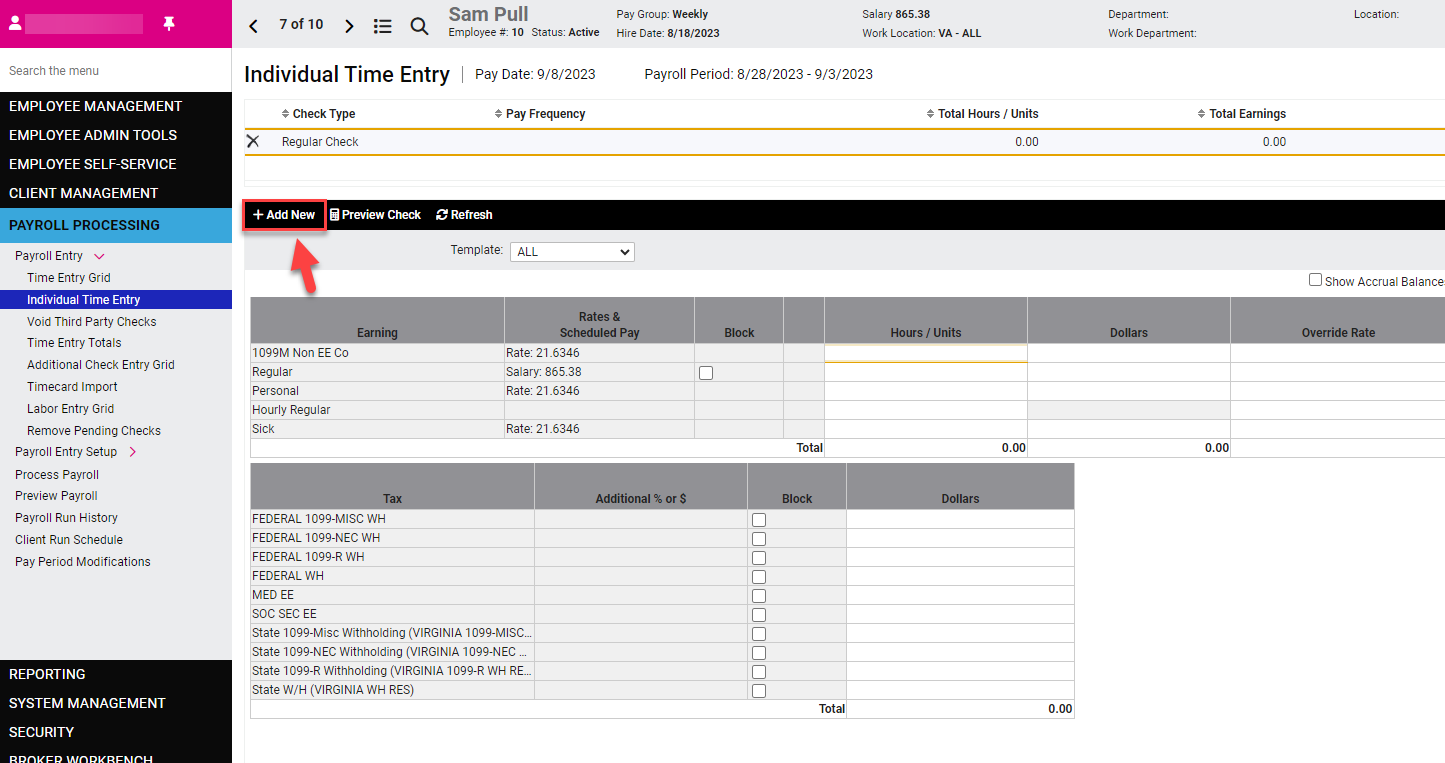
3. Select your Check Type. Note – for most specials, you’ll want to choose Additional Check.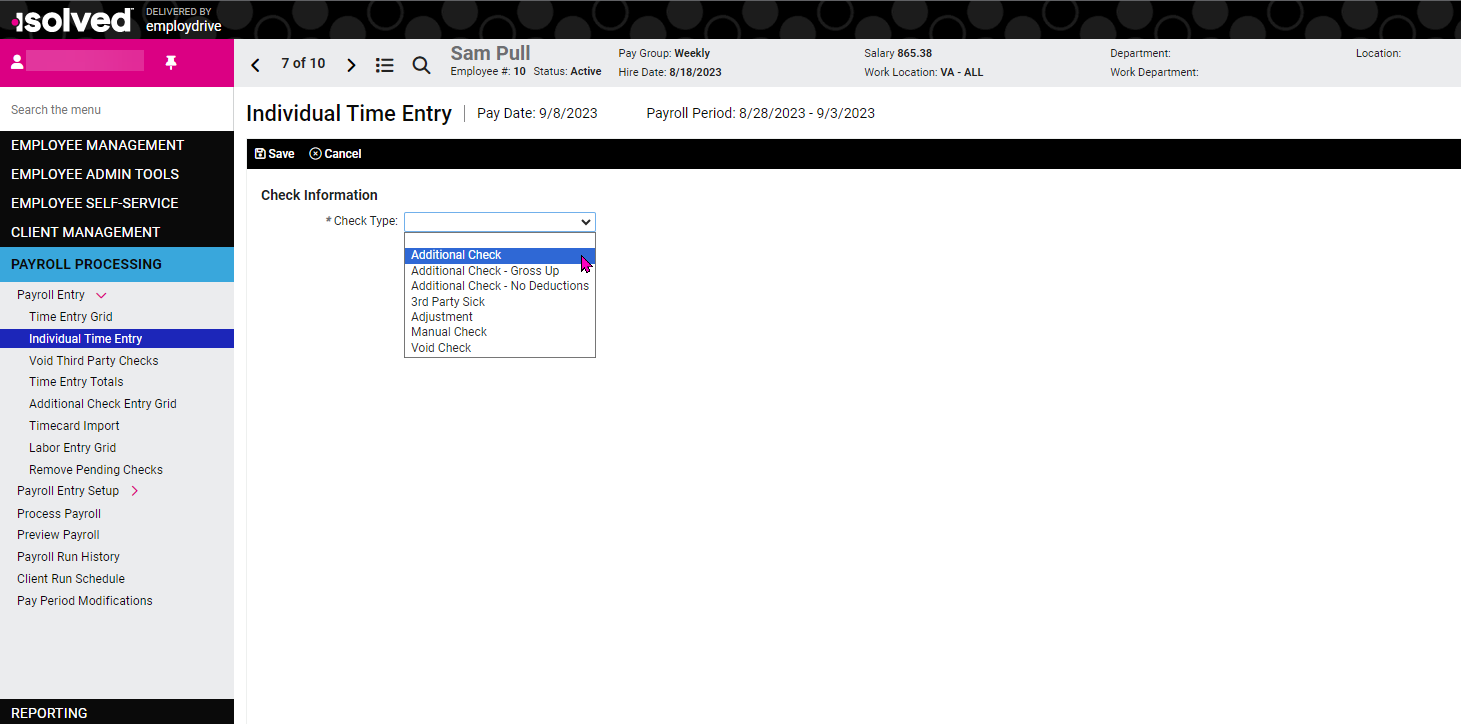
4. Save your newly created check.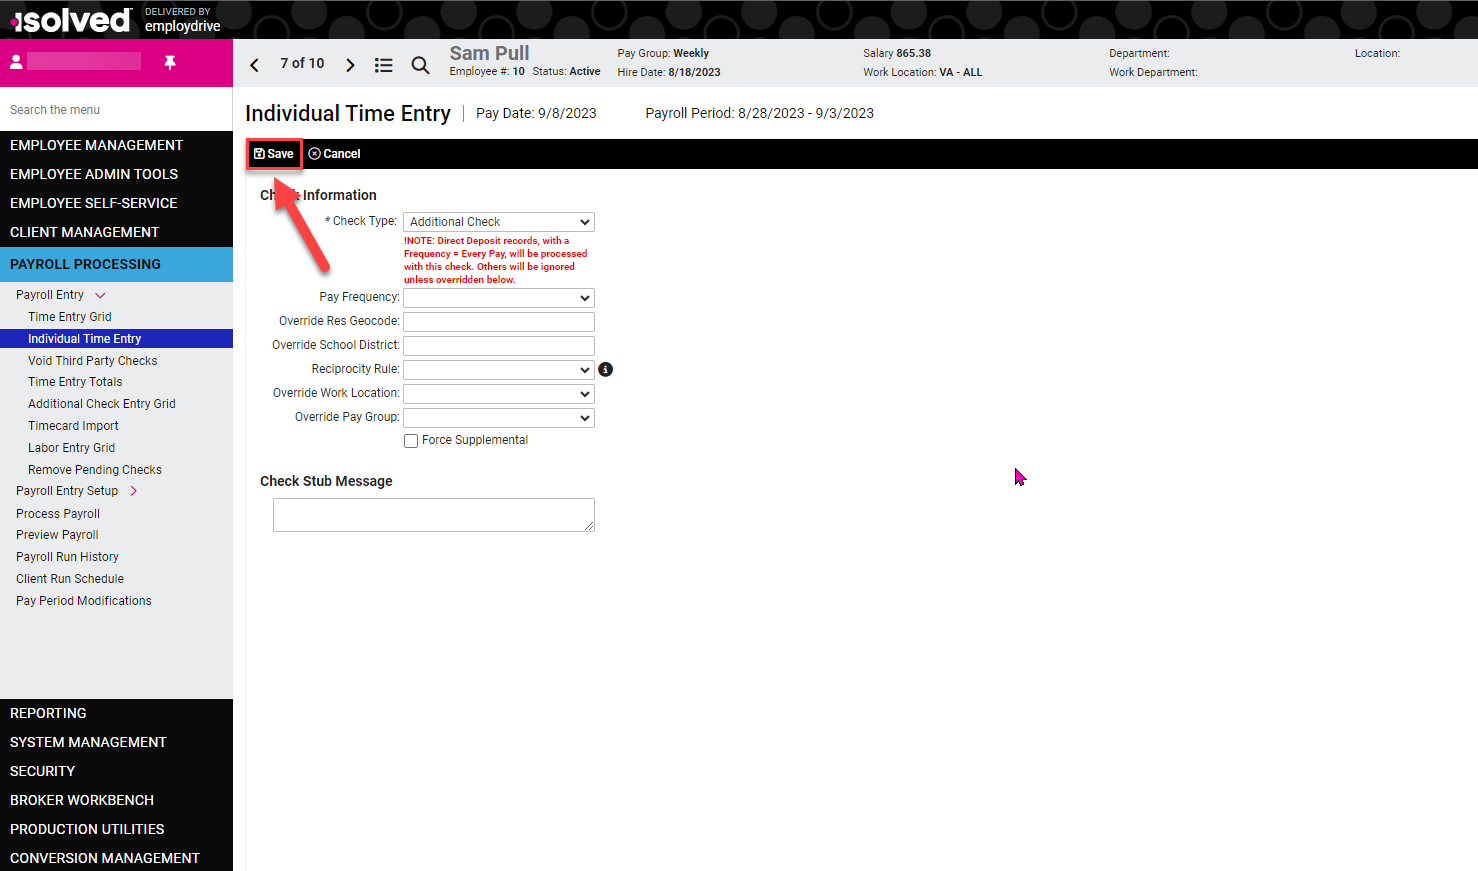
5. On the Individual Time Entry grid, make sure your Additional Check is selected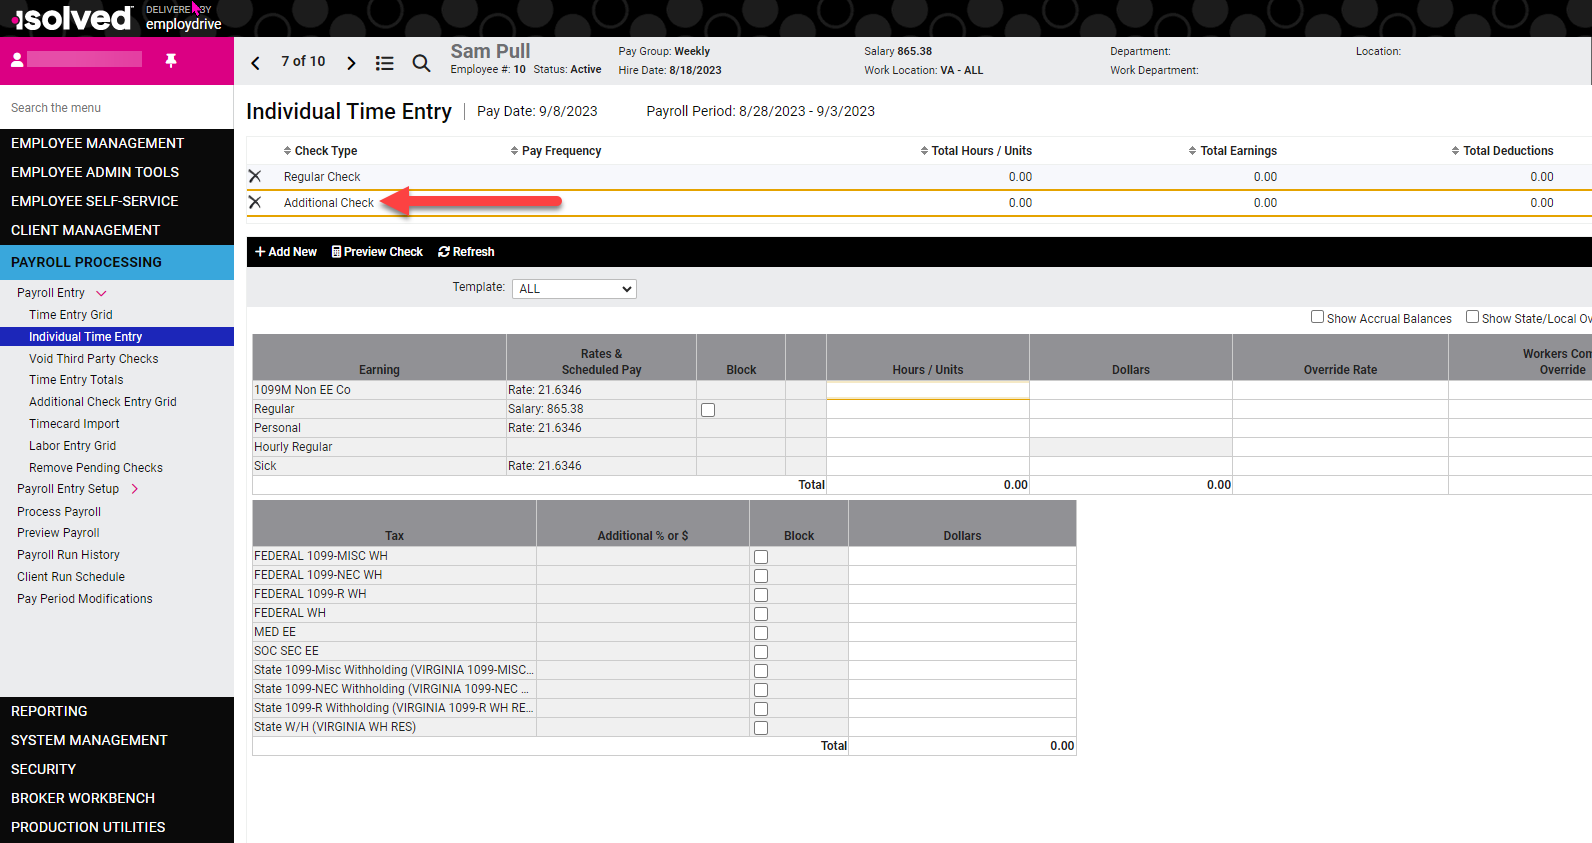
6. Input your payroll data (hours/dollars/deductions/etc), then preview your check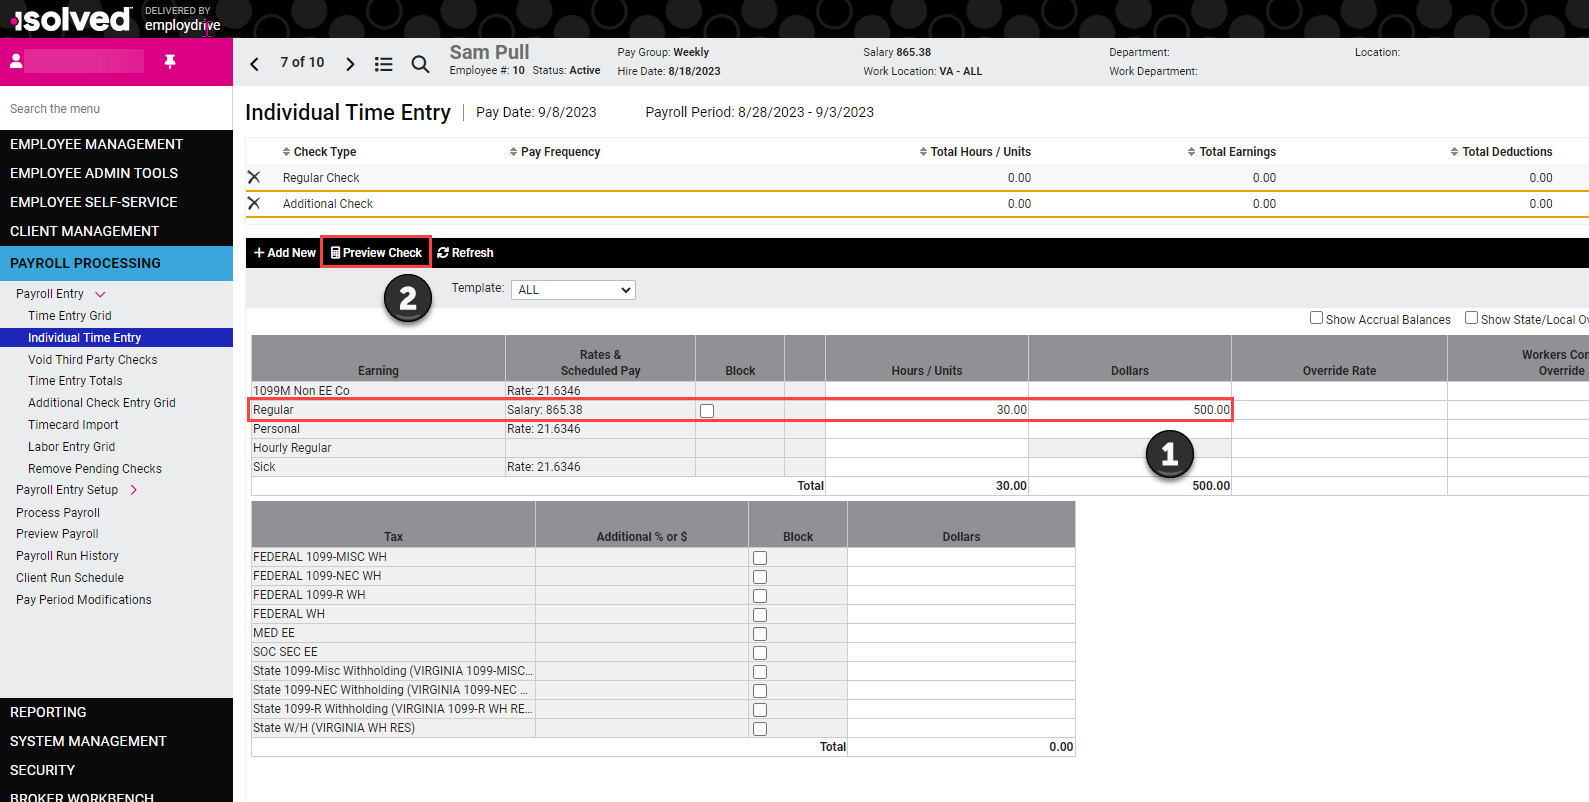
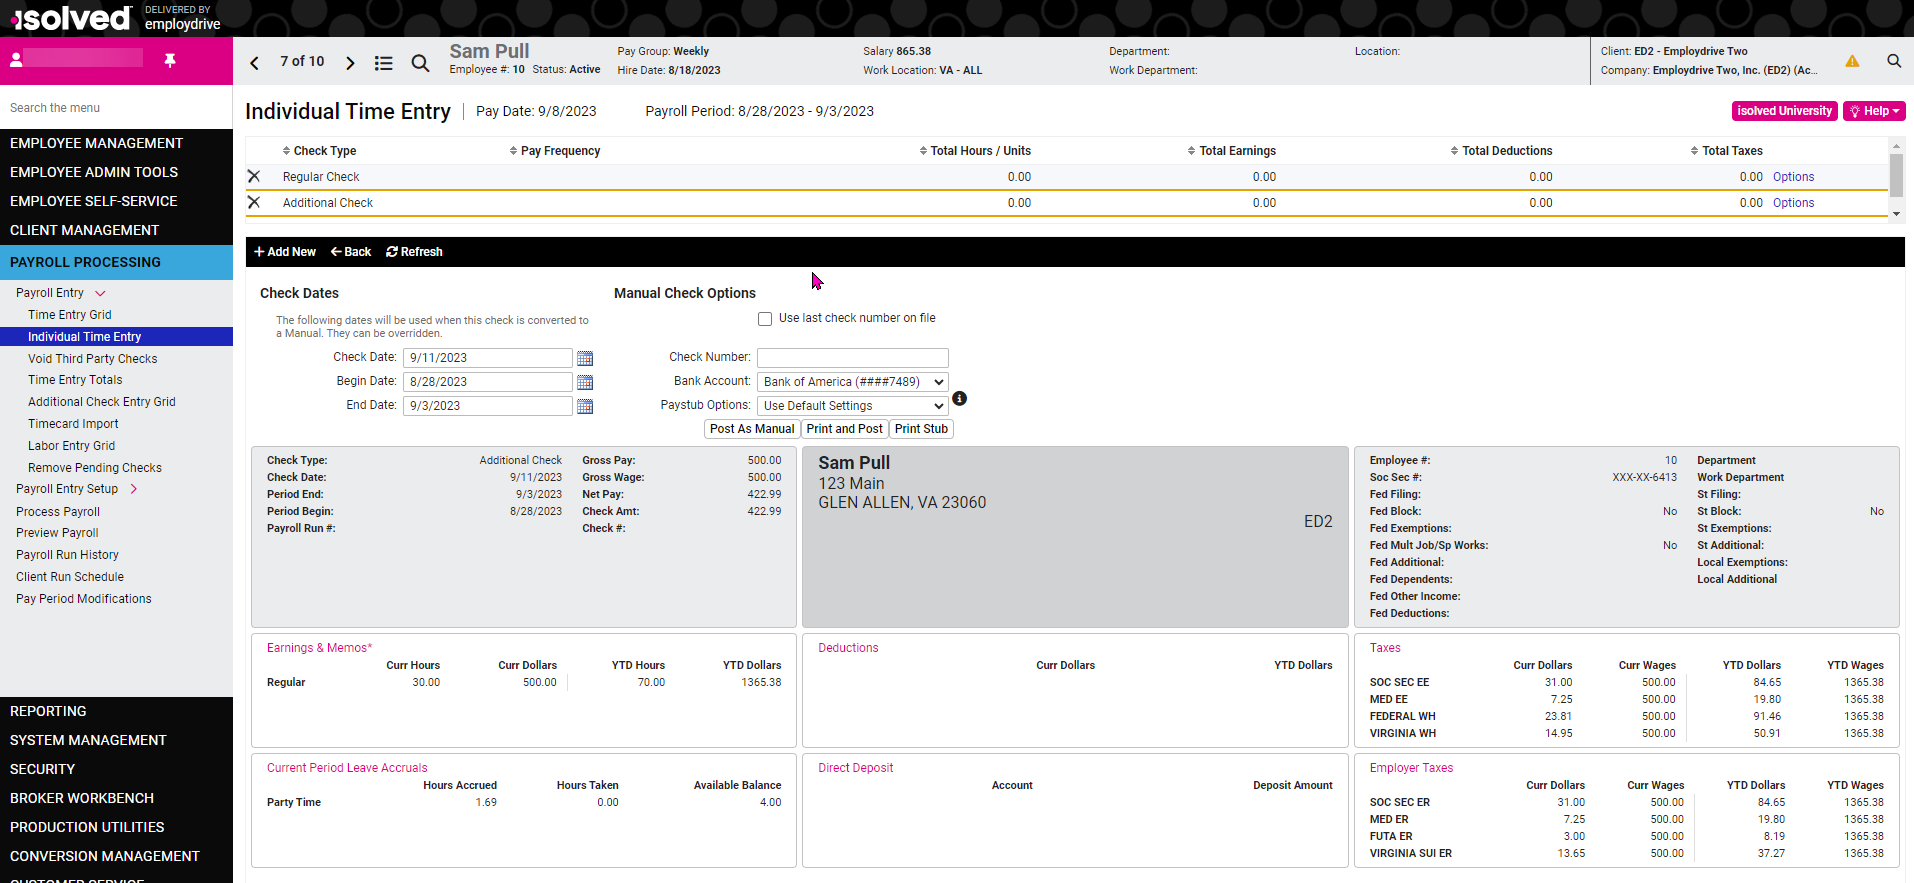
7. To preview your payroll, go to Payroll Processing >> Preview Payroll, click the Preview Payroll button.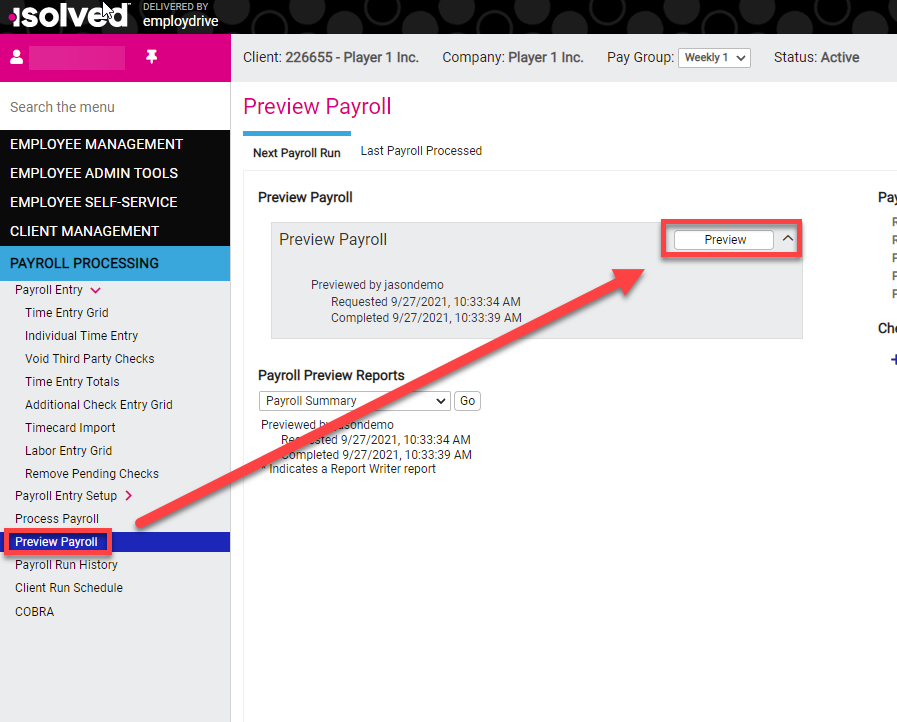
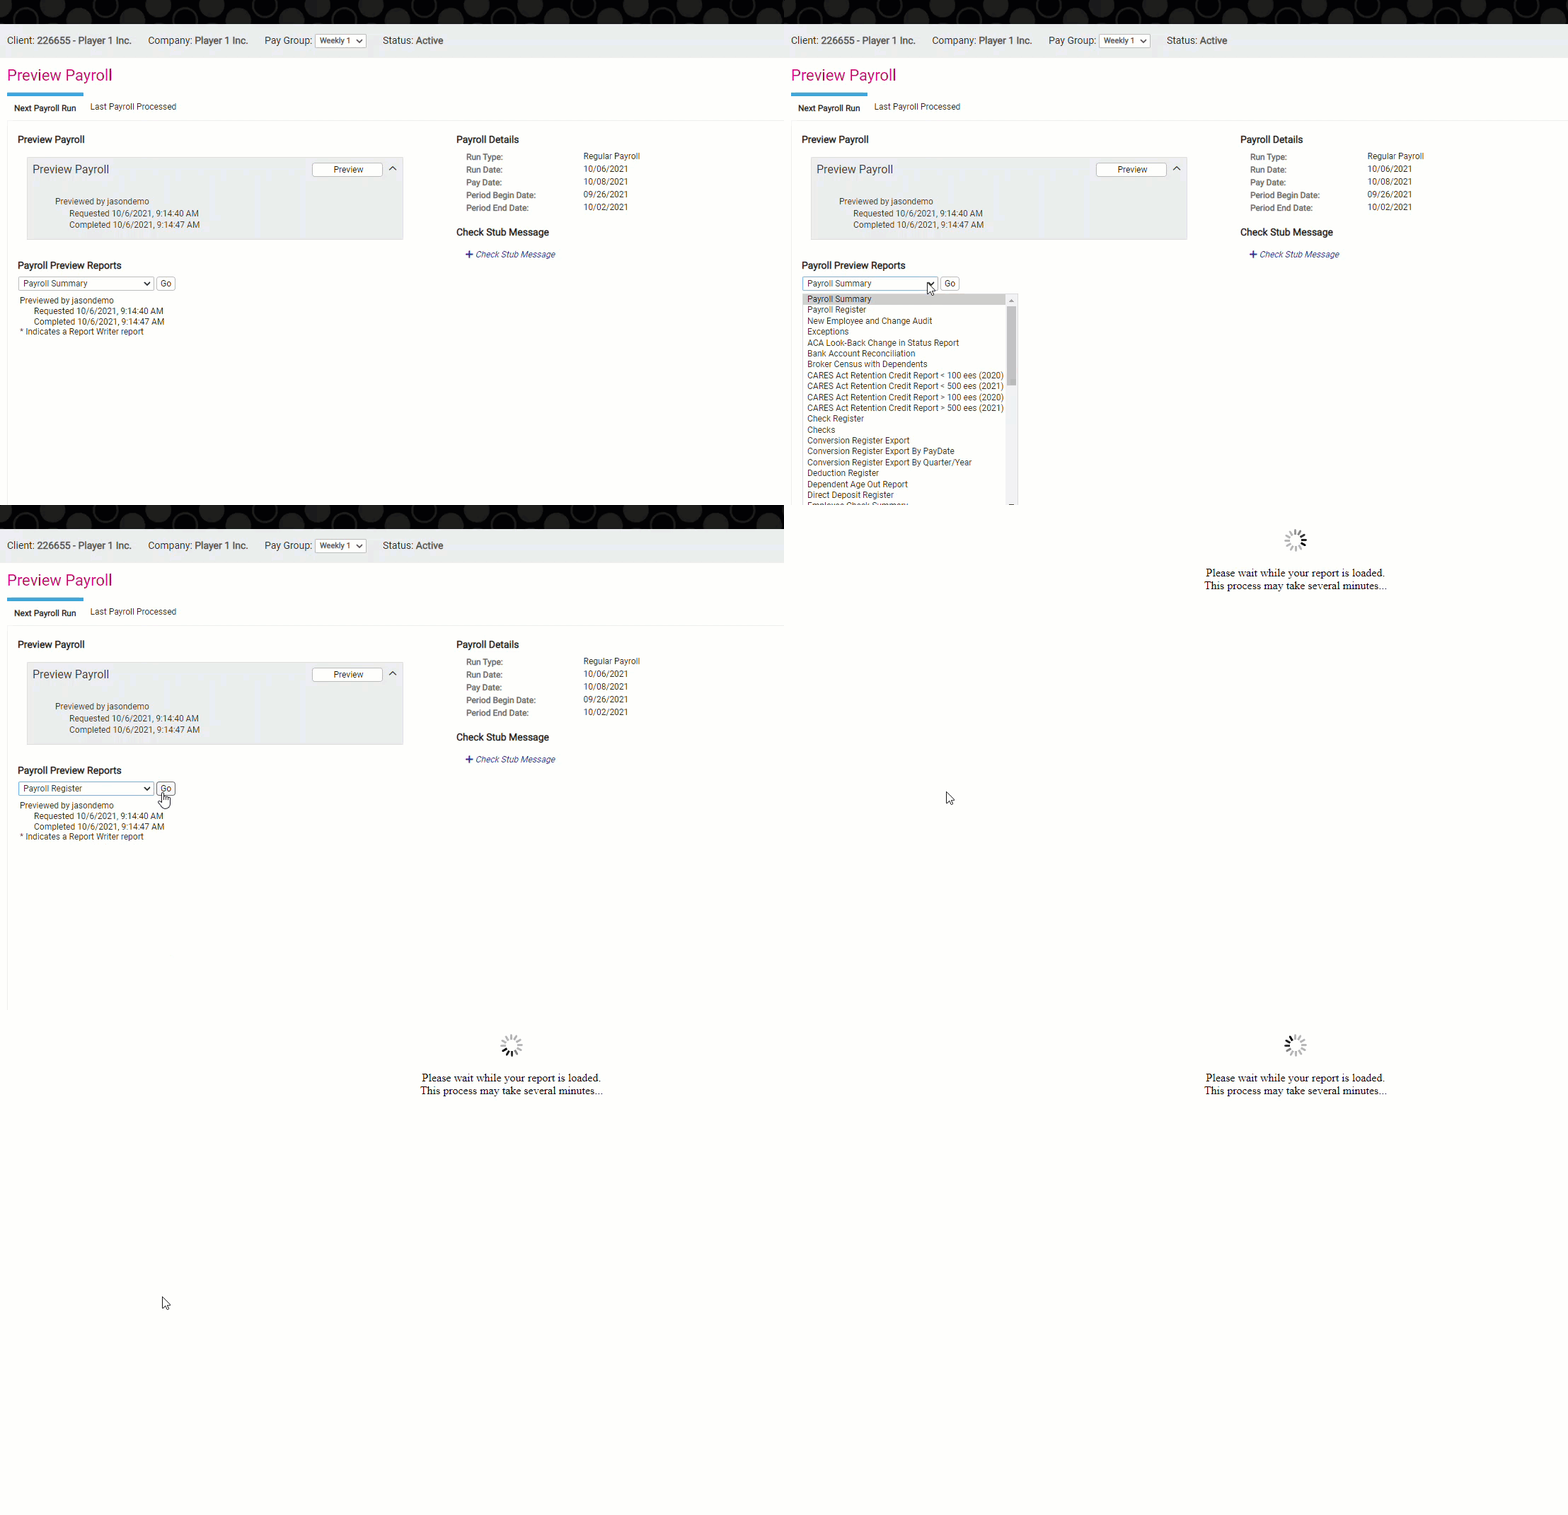
8. When the preview is complete select the following reports from the drop down to review:
a. Payroll Summary – This gives you the amount that will be Impounded and the date of the impound to fund your payroll as well as a summary of head counts, check counts, taxes, earnings, and deductions.
b. Payroll Register – This gives you a snap shot of each EE check with DD, Earnings, Deductions, and Taxes, etc.
c. Exceptions – This is crucial to review before you process. It has exceptions, for taxes, earnings, deductions, duplicate direct deposits.
9. Once you have reviewed the reports and are confident your payroll looks good you can process. If you made any changes after clicking on Preview Payroll you should Preview again. Then go to the Process Payroll >> Process Payroll. It will ask "Are you sure you want to process this payroll?" Click Process Payroll. 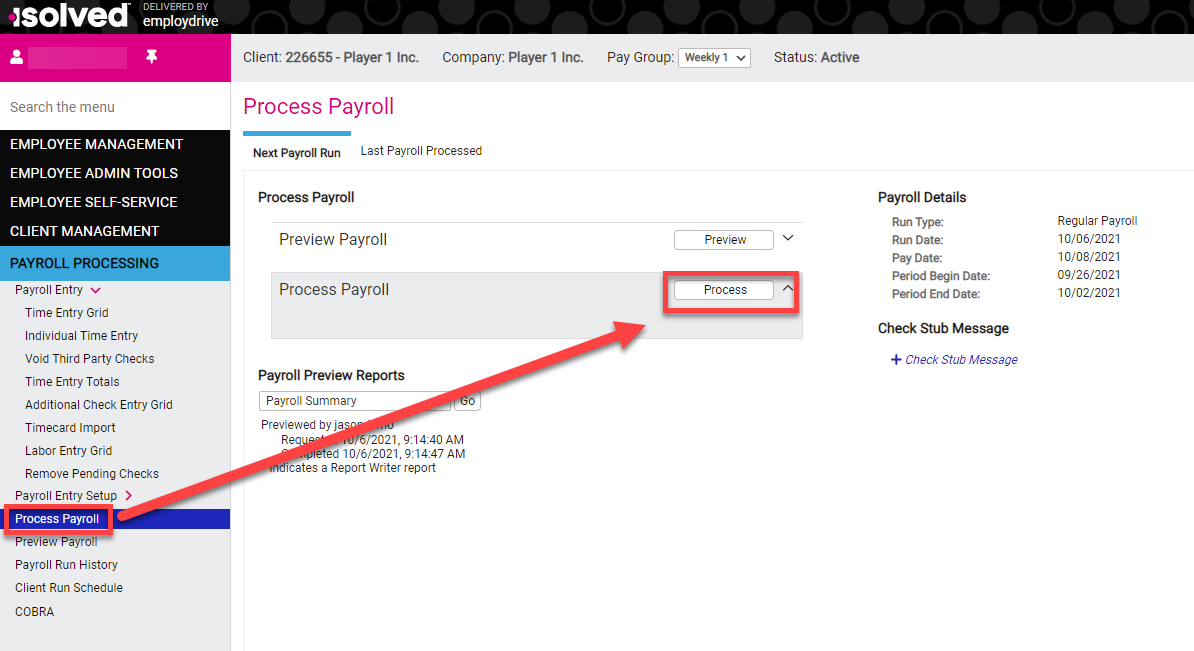
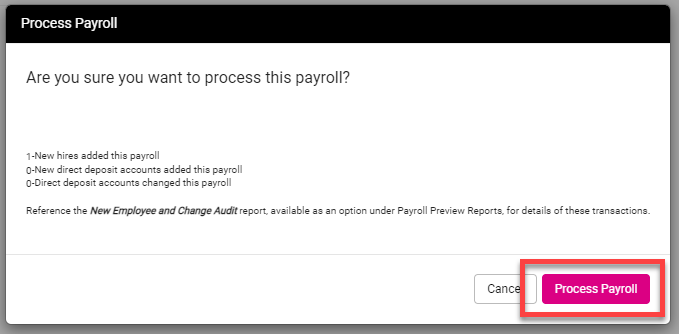
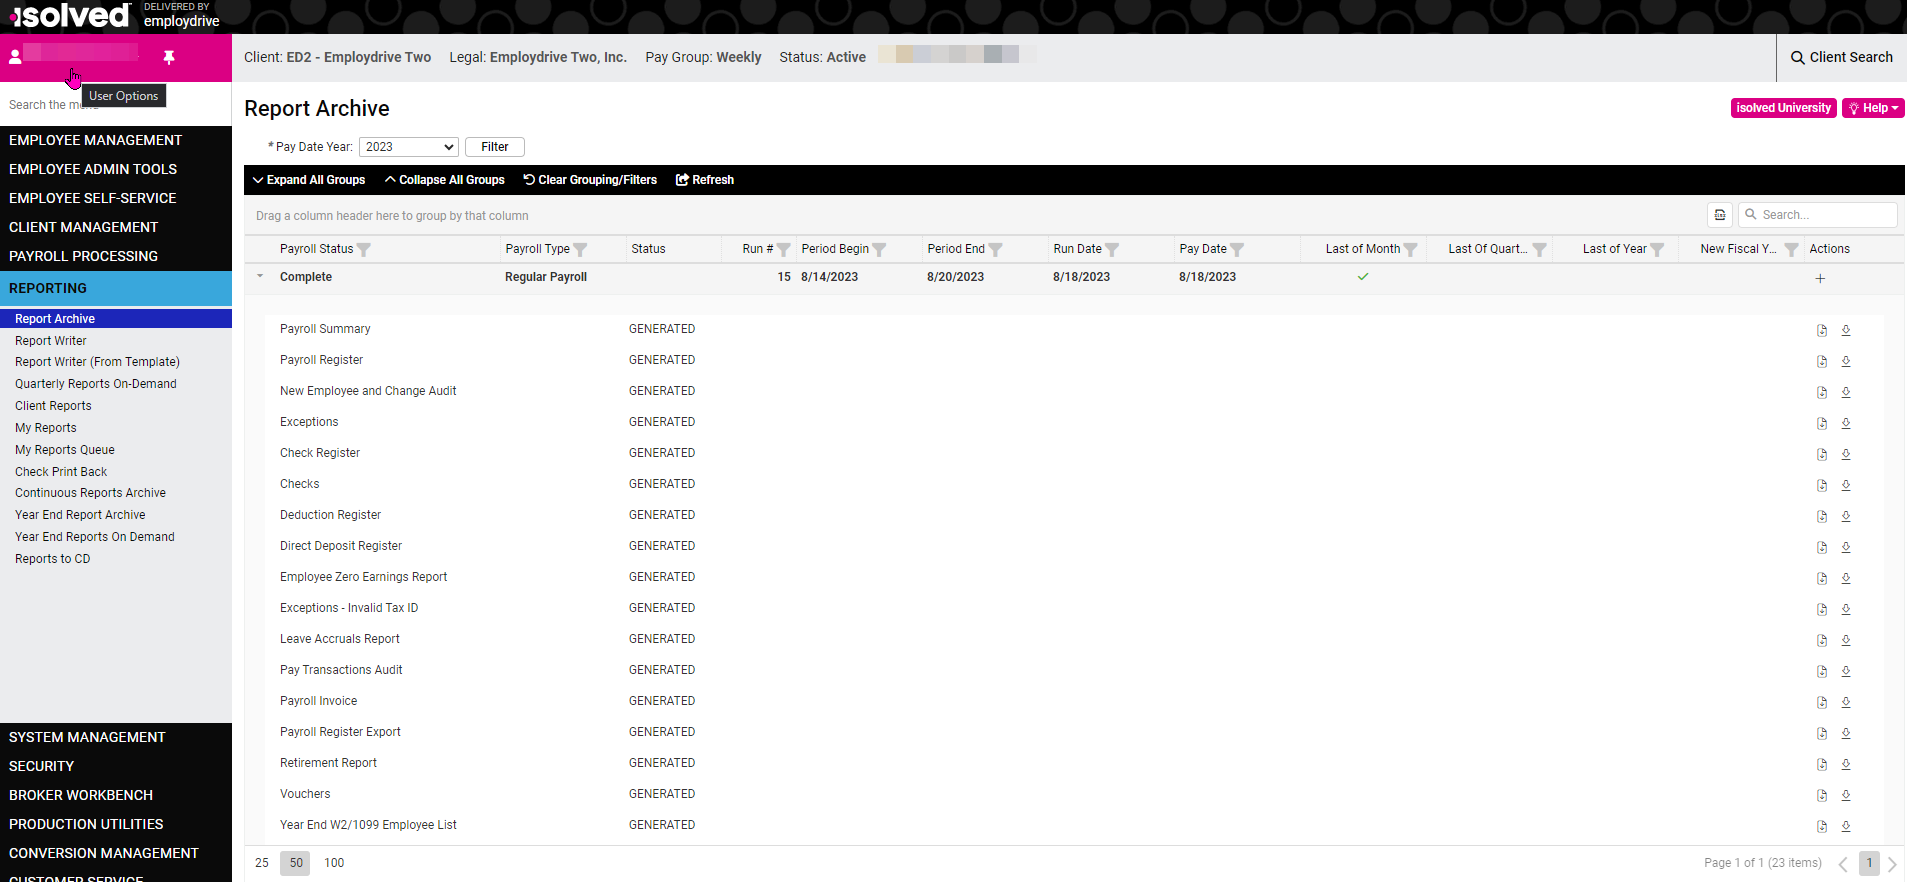
10. Reports will generate after you click the Process Payroll button and will be available under Reporting >> Reporting Archive.