The purpose of this article is to outline how to add and manage garnishments within isolved. This content is meant to be a general guide and may not cover all garnishment scenarios. If your employee's garnishment has unique requirements not addressed in this article, please reach out to support@employdrive.com for assistance.
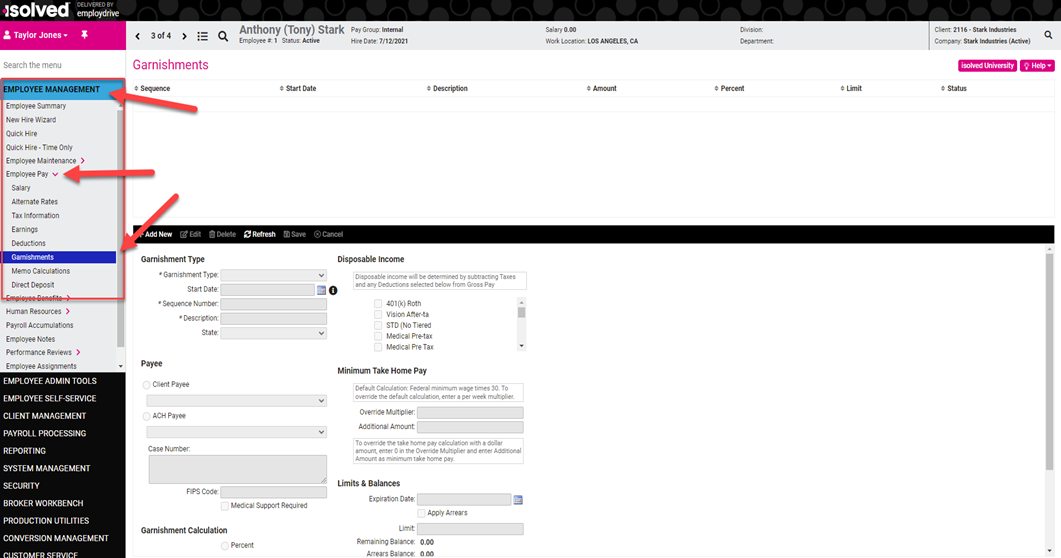
1. Go to Employee Management > Employee Pay > Garnishments
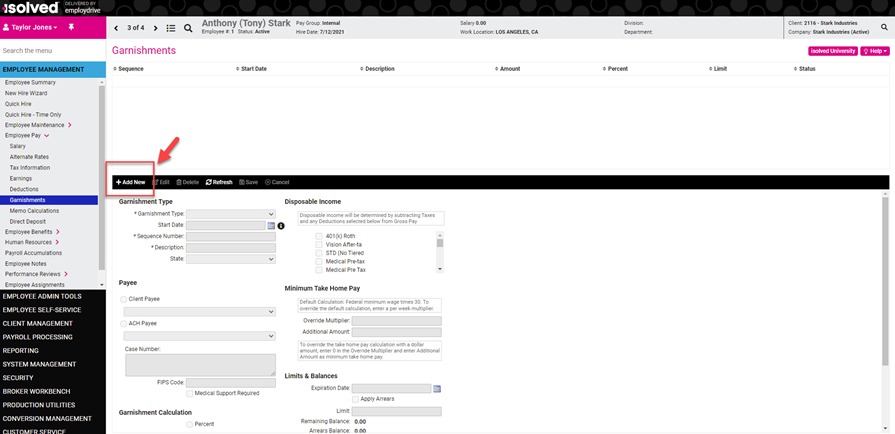
2. If adding a new order, select +Add New from the black action bar.
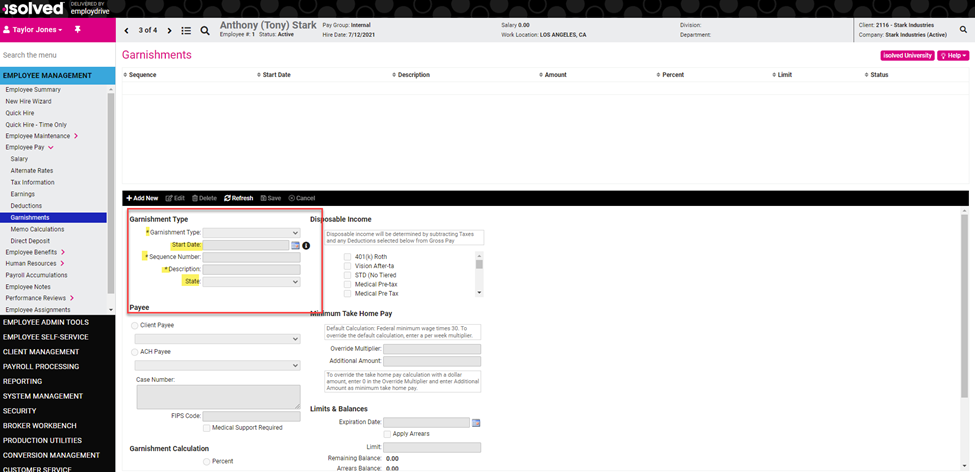
All fields that are noted with an asterisk * are required fields.
3. From the drop down under Garnishment Type select the appropriate type (i.e. Child Support, Bankruptcy, Levy, etc.).
4. If the Start Date field is left blank, the garnishment will start on the next available payroll. You may enter a future date if the garnishment should not take effect immediately.
5. Sequence Number: Used to notate the order in which the garnishment will deduct from the payroll check.
6. State: Add the state in which the order was originated. By adding the state, it will narrow down the payees and include any state rules that apply to certain types of garnishments.
7. Description: This will be the name that will show on the employee’s paycheck. You can list the garnishment type and any account/case numbers.
e.g: Child Support-526462.
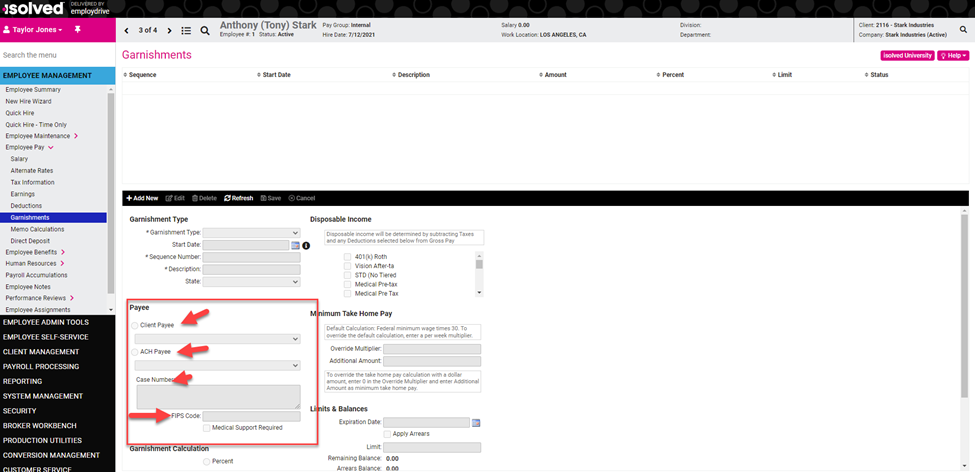
8. Payee: If the payee is not listed, you may add the payee by going to Client Management > Payroll > Third Parties. Please contact support@employdrive.com if you require assistance.
- Client Payee: List of all payees that will produce a live check.
- ACH Payee: List of all ACH payees that will send the funds electronically to the agency. Typically, ACH Payee is only used for child supports unless the order specifically states otherwise.
- Case number: This is the section you would enter any remittance information that the agency requires to be listed on the check.
- FIPS code: Typically, only used for child supports. Number is usually notated as a Locator Code on the order. The FIPS code may or may not be required. Please review your wage garnishment requirements carefully.
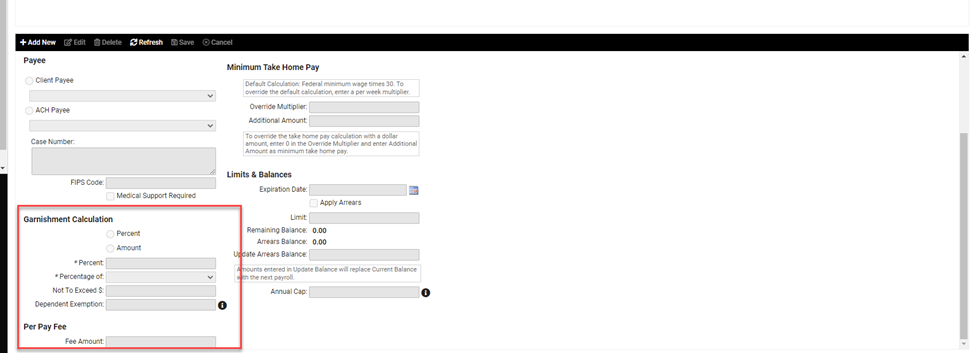
9. Garnishment calculations: This will either be a percentage of income or a flat dollar amount as notated on the order.
- Percentage of: The order will notate if it should be a percentage of disposable income, Net Pay or Gross pay.
- Not to Exceed $: Even though it is not notated as such, this is a required field. Order will usually state the max amount an order is allowed to deduct.
- Dependent Exemption: For any garnishments indicating an exemption for dependents, enter the exemption amount. The total amount calculated by the garnishment will be reduced by the exemption amount entered.
- Per Pay Fee: Many states allow clients to withhold an administrative fee for processing employee garnishments. Use this field to enter the applicable fee amount.
10. Minimum Take Home Pay is used mainly for Federal Tax levies in which the amounts will be specified on the order
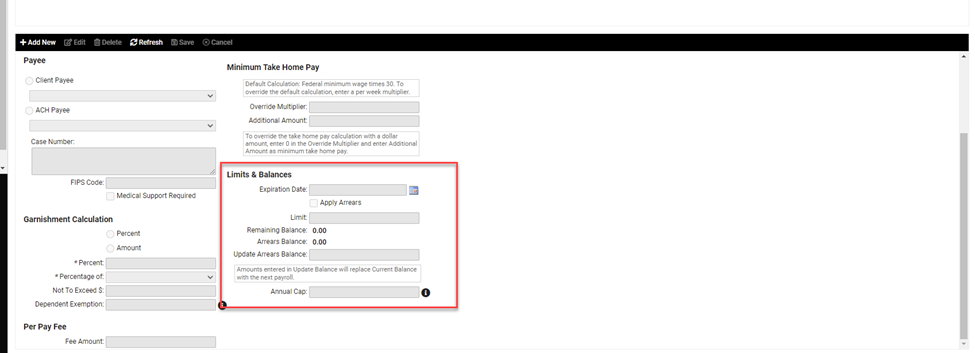
11. Limits and Balances
- Expiration Date: Used when the garnishment should cease after a specific period of time.
- Limit: This is where you enter the total garnishment amount to be deducted from the employee. Garnishment will stop deducting once this limit is reached.
**If both Expiration date and limit are entered the garnishment will stop based on which one is reached first.
- Remaining Balance and Arrears Balance are read only fields. The remaining balance will only populate if there is a limit and is the total amount left of the limit after deductions are taken. The arrears balance is only populated if the full deduction amount cannot be taken form a check due to less money being made.
- Update Arrears Balance: In this field you can change or remove the arrears balance with the next payroll run. The field will not regenerate until the next payroll has processed.
- Annual Cap: This field is used to set an annual limit on the amount allowed to be deducted. If a cap is entered the deductions will cease once the YTD limit is reached regardless of how many pay cycles are left. The deductions will begin again the following year, or if for any reason the YTD amount is lowered in the same year.
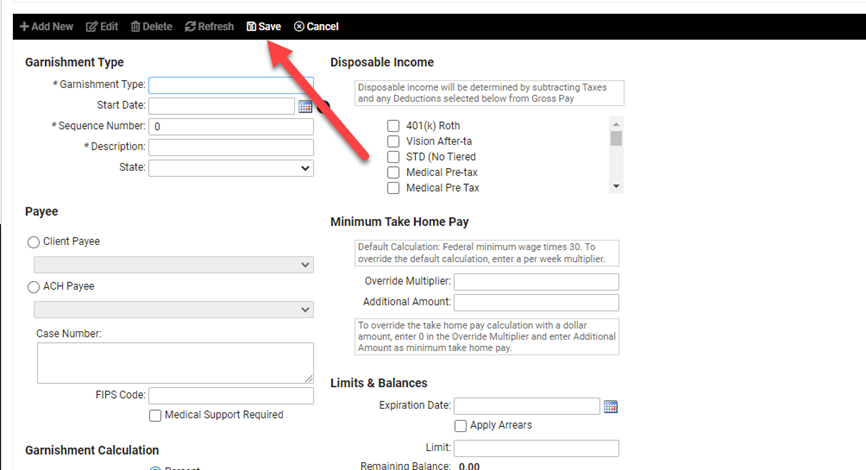
12. Click Save once you have completed all of the necessary field.
Once a garnishment has reached its limit or reached the expiration date, the deductions will automatically stop and the garnishment will display as inactive.
Multiple garnishments may be set up for individual employees. The deductions will calculate based on the Sequence Number and Not To Exceed limits.
