The purpose of this article is to walk through the steps of adding Workers Comp (WC) codes and rates to isolved as well as assigning WC codes to employees.
WC Codes and Rate by state must first be set up at the Client level.
1. Login to isolved
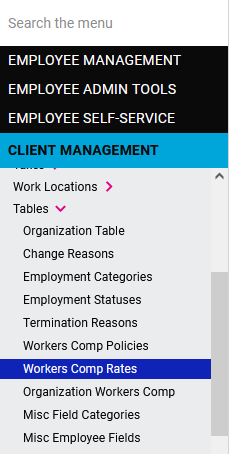
2. Navigate to Client Management > Tables > Workers Comp Rates

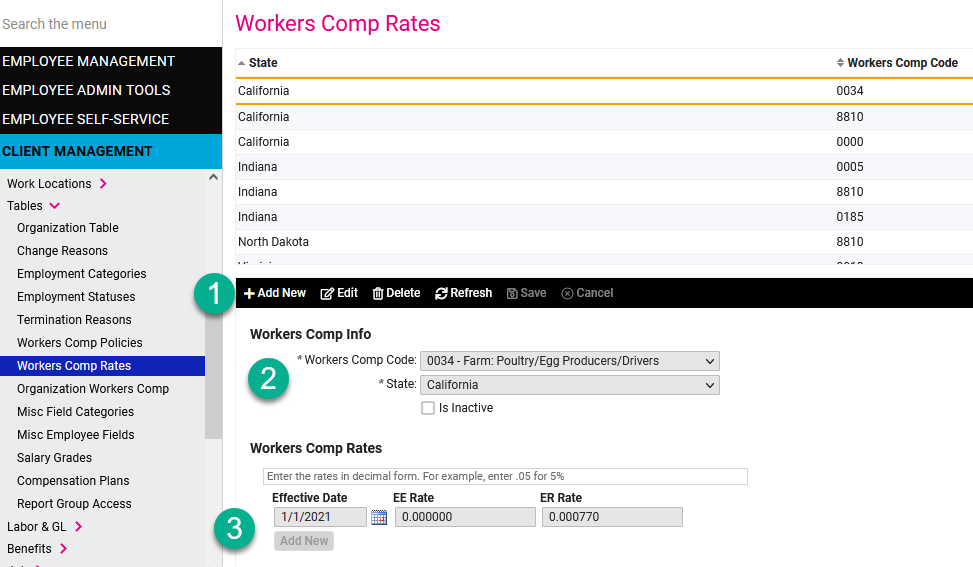
3. You may add new codes to your isolved environment:
- Click +Add New
- Select the Workers Comp Code and State. If you do not see a code that is part of your WC policy, email support@employdrive.com
- Set the Effective Date, EE Rate (if applicable) and ER Rate. Then click Save.

4. If the State and WC code is already set up and you need to update the Workers Comp Rates, simply click Edit in the black action ribbon and then click Add New under the Workers Comp Rates section.
Once the codes are set up at the Client level, you may assign codes to your employees.
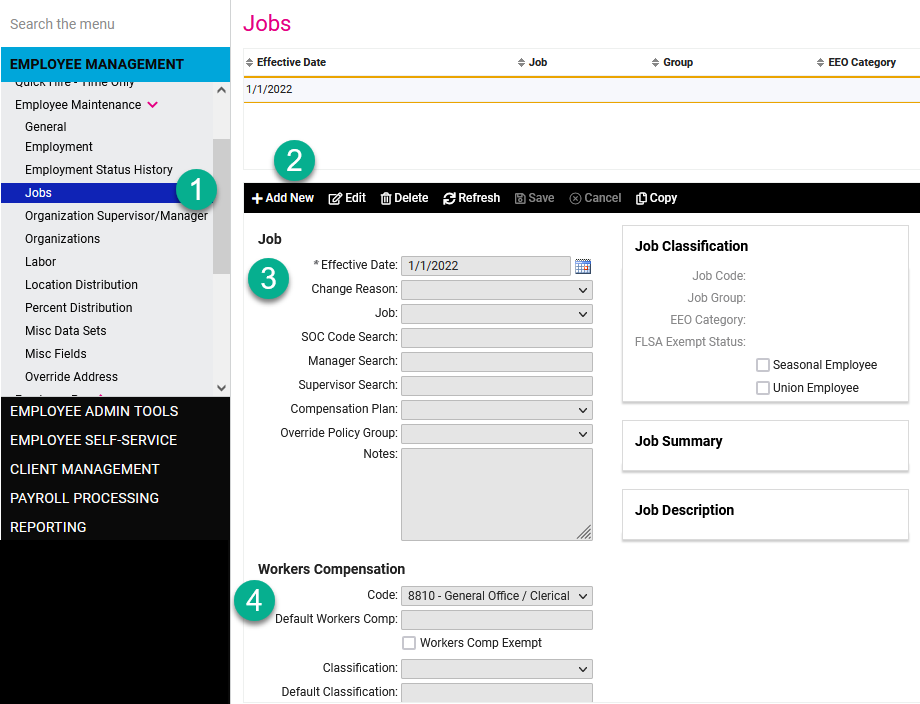
- Navigate to Employee Management > Employee Maintenance > Jobs
- Click +Add New to add a net new job, or click Edit if you just want to change the existing job.
- Set the Effective Date and then select the Code under Workers Compensation. Click Save.
- IMPORTANT: The Code drop down menu will display all codes that are set up under the Client Management Workers Comp Rates. The codes presented under the Job menu are not limited to the codes set up for the work state of a particular employee. In other words, it is possible to assign a code to an employee that is set up for a state the employee is not working in and not the state the employee is working in. Please ensure your Workers Comp rates by state are accurate under Client Management prior to assigning codes to employees.

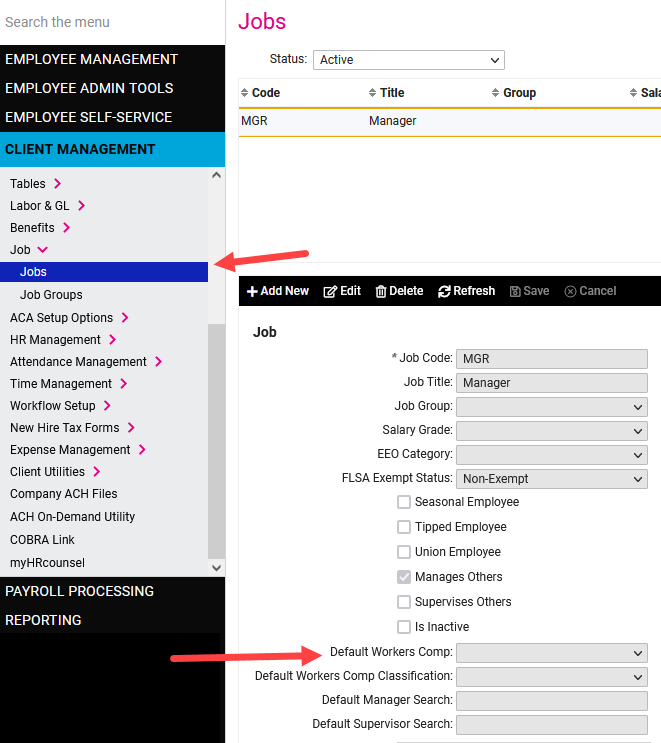
There is a second way to assign WC codes to employees which is also managed by the Job. At the Client level, you may assign a Default Workers Comp code to the Job. Then, anyone assigned that job will automatically receive the WC Code.
