Adding / Removing Employee Life Events
Adding/Removing a Life Event to Trigger an Ongoing Enrollment for HR Admins

Updated at July 25th, 2022
This article is intended for HR admins and will walk them through the steps of adding a life event to an employee record. These are most commonly used with our clients to trigger an Ongoing Enrollment to then allow employees to log in to their Self-Service Portal to make their benefit elections.
1. Identify Which Life Event Applies
There are a number of Life Events present in the system to add to employee records. All of the Life Events are prebuilt in the system, and unfortunately as a result, Employdrive cannot create any additional life events or make any changes. These cover a wide variety of instances and are consistent with insurance provider requirements for qualifying life events to enroll employees in a company plan.
Life Events Available:
- Adoption/Legal Guardianship
- Benefits Life Event
- Birth
- Change to Full-time Student
- Child Death
- Child No Longer Eligible
- Civil Union
- COVID-19
- Dependent Becomes Eligible
- Divorce / Legal Separation
- Gain of Other Benefit Eligibility
- Gain of Spouse's Benefit Eligibility
- Loss of Other Benefit Eligibility
- Loss of Other Coverage
- Loss of Spouse's Benefit Eligibility
- Marriage
- Rehire
- Remove a Dependent - Other
- Spouse Death
Enrollments are built with a predetermined set of Life Events provided to EmployDrive when initially building the enrollment. Not all Life Events may be applied to your specific enrollment, so you will want to be sure you are adding a Life Event that will apply to your enrollment.
Another thing to note is that Life Events have rules and time limits, and depending on the date of the Life Event, can affect when and how long the enrollment will be available.
Here are some examples of how Life Events can be set up:
Birth: The enrollment period begins (10) days (Before) the event date (Birth) and is open for (30) days
This means you can future date the Birth Life Event for when the baby is expected and the enrollment will open 10 days before the date entered and remain open for 30 days thereafter.
Rehire: The enrollment period begins (15) days (After) the event date (Rehire) and is open for (60) days
For this example, if an employee is rehired, the enrollment would begin 15 days after the rehire date and would remain open for 30 days.
If you are unsure what Life Events apply to your Enrollment, or what the rules associated with the Life Events are, please feel free to contact support@employdrive.com for any assistance gathering that information.
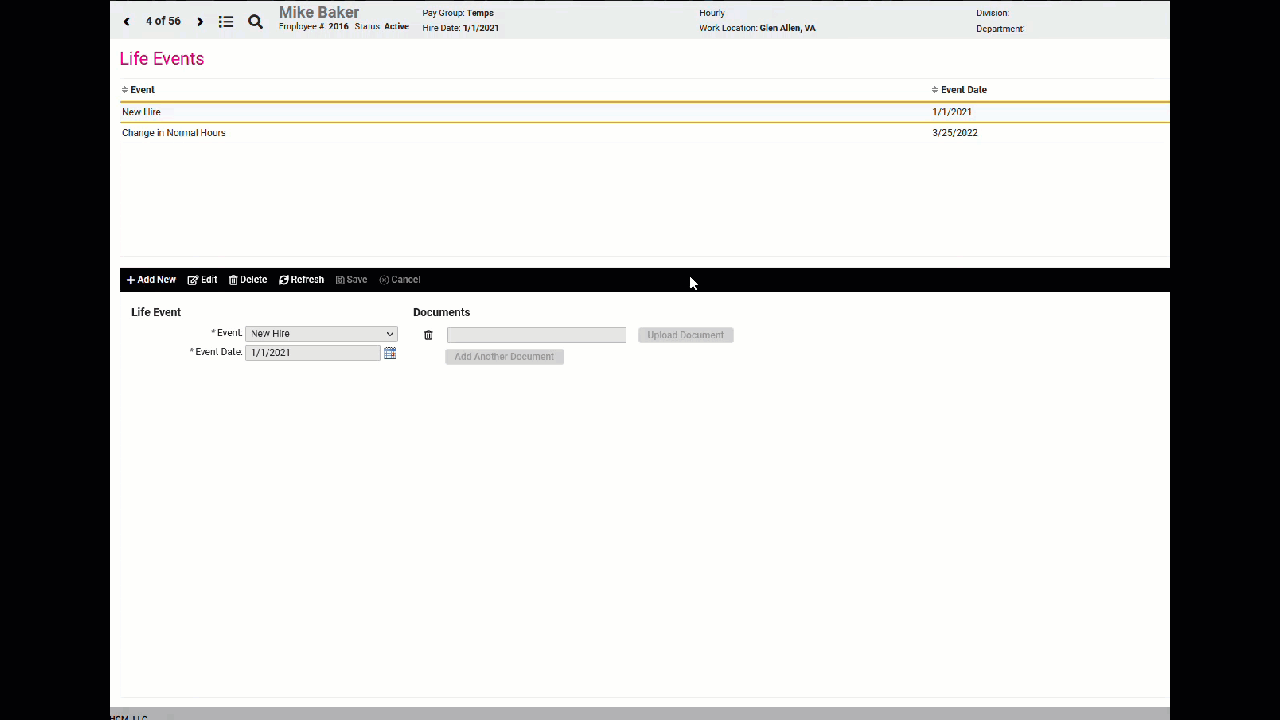
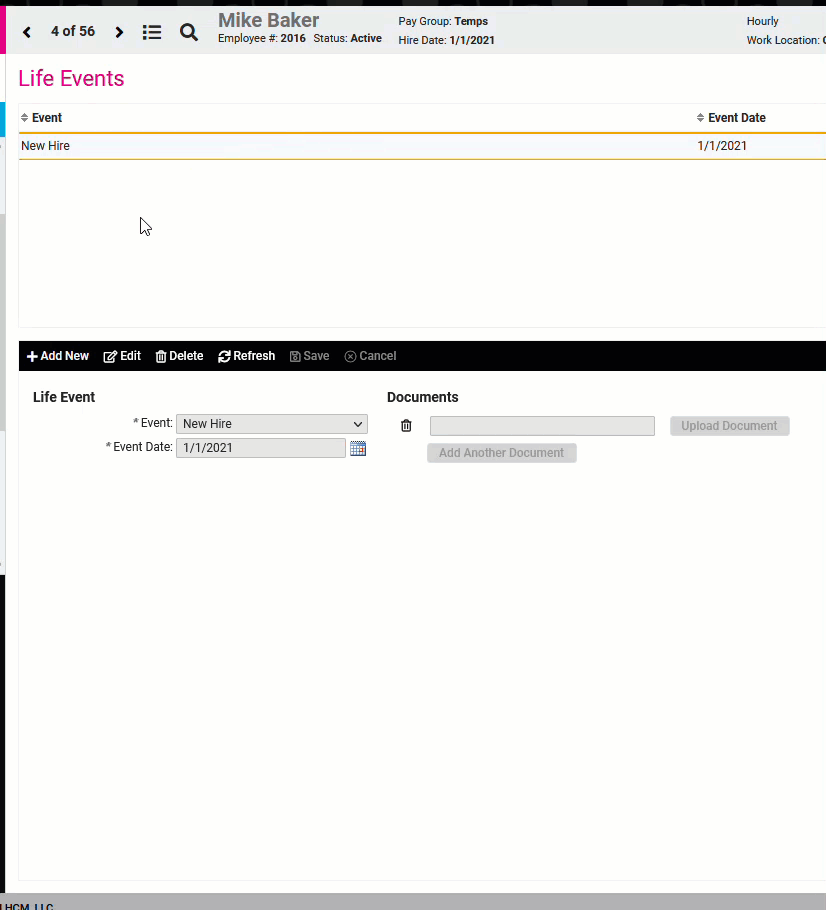
2. Adding the Life Event to the Employee Record
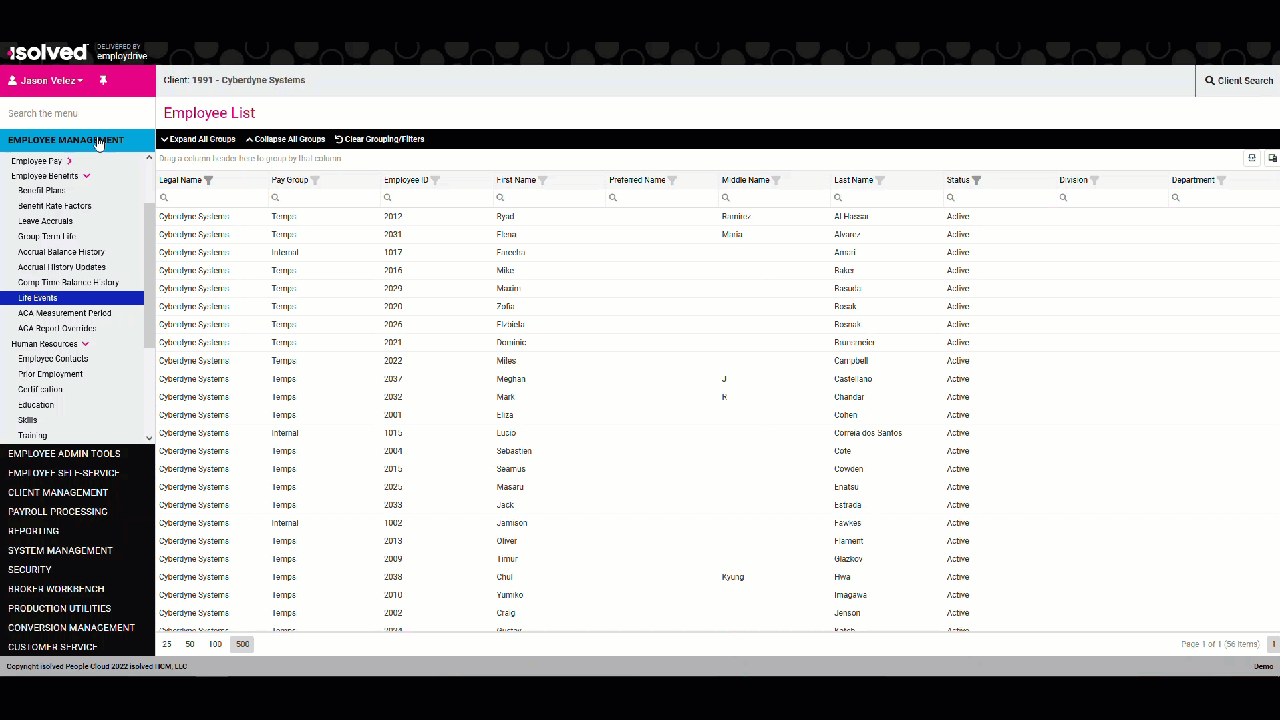
Navigate to the Employee Management >> Employee Benefits >> Life Events screen and select which employee you would like to add:
From there, you would select Add New and select which Life Event you would like to add to the Employee Record. Keep in mind, you can set this date in the future or in the past, and depending on how the Life Event rule is set up in the enrollment will determine when the employee will be able to access their enrollment. Once the Life Event has been added, you can click Save.
If the life event involves a dependent, the option for contact may appear. You may have to add an employee contact to satisfy this requirement. Please reference the Adding Dependents to Employee Records and Benefit Plans article for further reference for adding and employee contact.
There is also an option to add any related document to the Life Event record. This is not a required field and can be ignored unless your provider requires any documentation on a Qualifying Life Event.
Once the Life Event has been added, the employee should receive an email notification when they are eligible to enroll. This is typically set up when creating the enrollment. If you need to change or adjust any messaging, please contact support@employdrive.com
3. Removing a Life Event
If a Life Event has been entered in error or was simply used to trigger an enrollment but is no longer needed for the employee record, you can delete the Life Event.
Navigate to the Employee Management >> Employee Benefits >> Life Events screen and select the employee you would like to delete a Life Event for.
Select which life event you would like to delete, and click on the Delete button in the action bar: