isolved Employee Termination Import Process

Updated at May 28th, 2024
The purpose of this article is to review how to terminate employees in isolved using a file import.
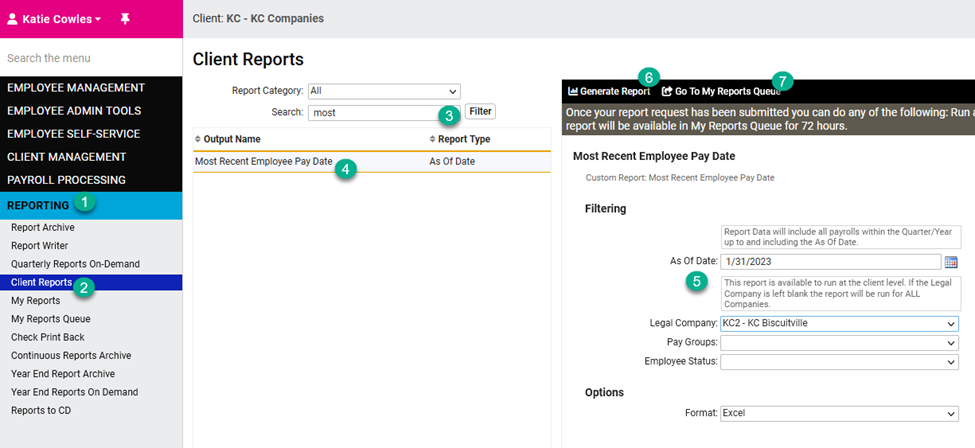
- Log into isolved and navigate to Reporting - Client Reports
- Filter to "Most" using the Search bar and choose Most Recent Employee Pay Date report
- Set the parameters and click Generate Report
- Click Go To My Reports Queue to retrieve the generated report
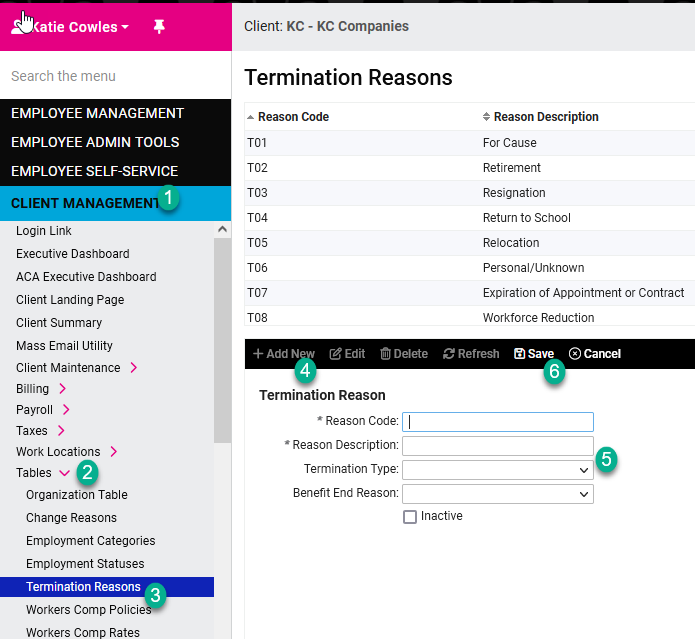
- If applicable, additional Termination Reasons can be added in isolved
- Navigate to Client Management - Tables - Termination Reasons
- Add New Code, Reason Description, Termination Type (not required but suggested), then click Save
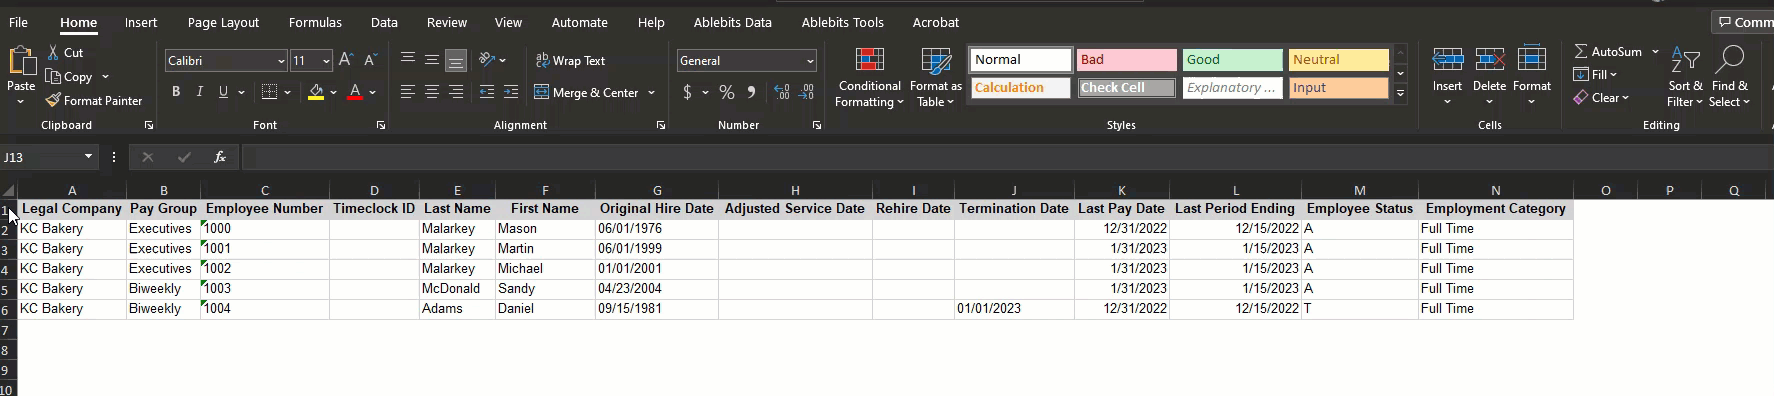
- Review the Most Recent Employee Pay Date report to determine who should be terminated.
- Last Pay Date = last date employee was paid
-
Last Period Ending = pay period end date of last date employee was paid

- When importing files into isolved, the headers must match isolved's requirements. For your convenience, we created a template to copy & paste the correct headers. Use Client_Term Import Template for Headers to import updated termination status, dates, and reasons.
- Client_Term Import template.xlsx
- Using the Most Recent Pay Date report as your file to import, copy and paste the headers from the Client_Term Import Template
- Remove any employee rows that do not need to be updated
- Add Termination Reason and Status (T) for all rows in the file,
- Remove the original Header Row
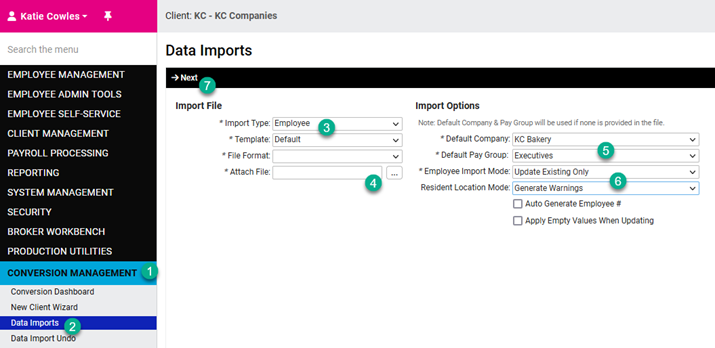
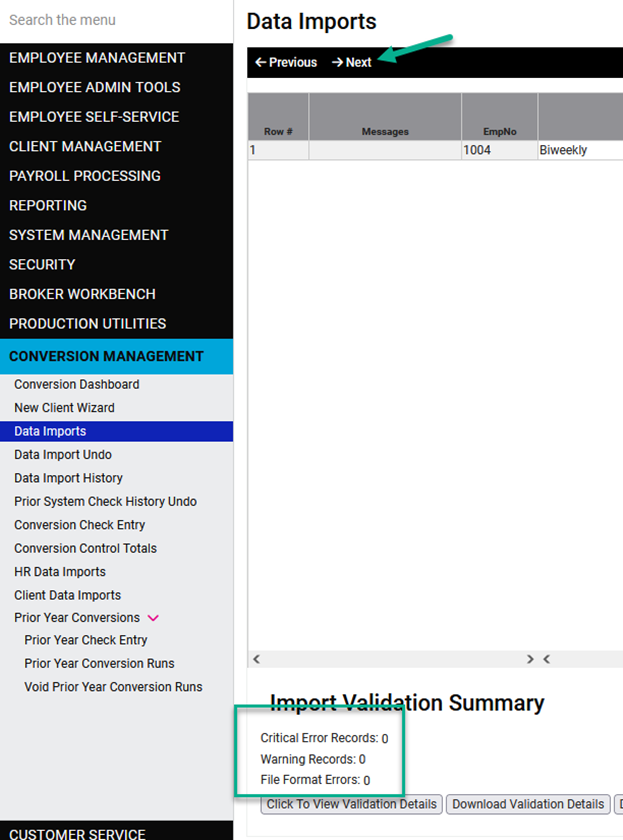
- Now you are ready to import the file into isolved. Navigate to Conversion Management - Data Imports
- Import Type = Employee
- Template = Default
- File Format = Excel
- Attach File = Choose the file you created using the steps outlined above
- Default Company = Choose Client (if applicable)
- Default Pay Group = Choose Pay Group (you may import employees across multiple pay groups using one file)
- Employee Import Mode = Update Existing Only
- Resident Location Mode = Generate Warnings
- Click Next
- There should be no warnings or errors under “Import Validation Summary”
- If there are warnings, reach out to Support@employdrive.com and provide the notification information
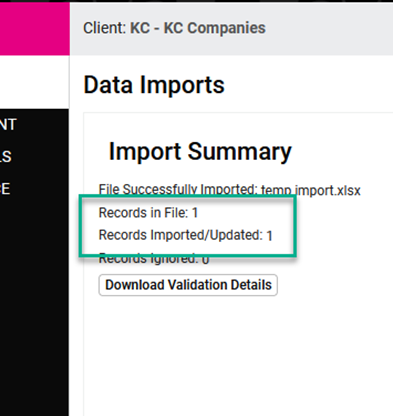
- Click Next - this will bring the file into isolved and update employee status
- The Import Summary will validate the number of records (employees) that imported successfully.
- If you manage Benefit plans in isolved, there is one additional step required to finalize the termination of benefits on the employee records. The steps outlined below will update the employee record with benefit stop dates.
- After importing the terminated employee import, navigate to Employee Admin Tools - Employee Utilities - Benefit Evaluation
- Select Employee Termination - Terminated employees with active benefit plan record(s) - Get Results
- Table displays terminated employees with active benefit records
- Click Select All for mass updates or individual Check Boxesfor specific employee updates
- Once selected, the Update Stop Date can be edited, if needed
- Click Save and the records updated will reflect on the next screen with confirmation
1716289991577-Ee6BtMWuvb5OhNTrW2Gqw_4B6G0tSxfcrnKvQP6EdWiaBQ_e_a1yhZo