Open Enrollment Participant Process

Updated at May 16th, 2024
To begin the enrollment process, log in to your payroll account at https://employdrive.myisolved.com/ and click on "Benefit Enrollment."

1. Enrollment Information
1a. Welcome

You will begin the enrollment process on the welcome screen. This screen show you the dates that you are eligible to enroll in benefits as well as any messages, documents, and external links about the benefits being offered.
You will also notice your progress is tracked at the top of your screen. Your benefits enrollment is not complete until the progress changes to complete. Until that point, no elections will be recorded in your payroll record. It is very important that you make sure that you complete all steps until the progress shows complete.
To continue, click Next on the black action bar at the top of the screen.
1b. Beneficiaries and Dependents

On this screen, you can add any dependents that will be on your benefit plans or anyone designated as a beneficiary for benefits such as Life Insurance.
Click the "+" to add your first Contact.
1c. Adding a Contact
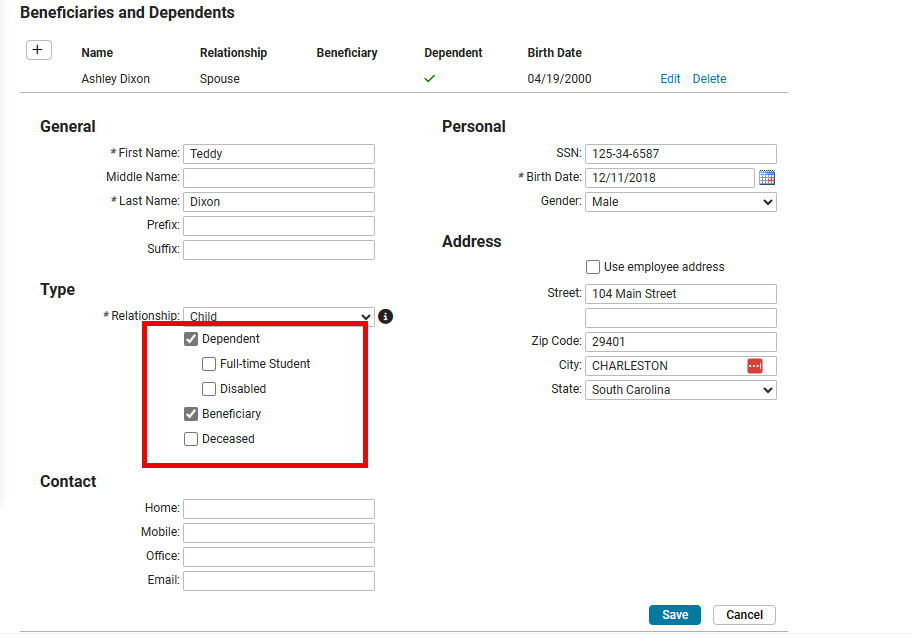
You will notice certain fields with an asterisk next to them. Those are required fields. Make sure to add the designation as to if the contact is a dependent and/or a beneficiary.
In order to finish adding the contact, you must click the Save button. Click Next when you have finished adding your contacts.
2. Preview
2a. Cost Analysis
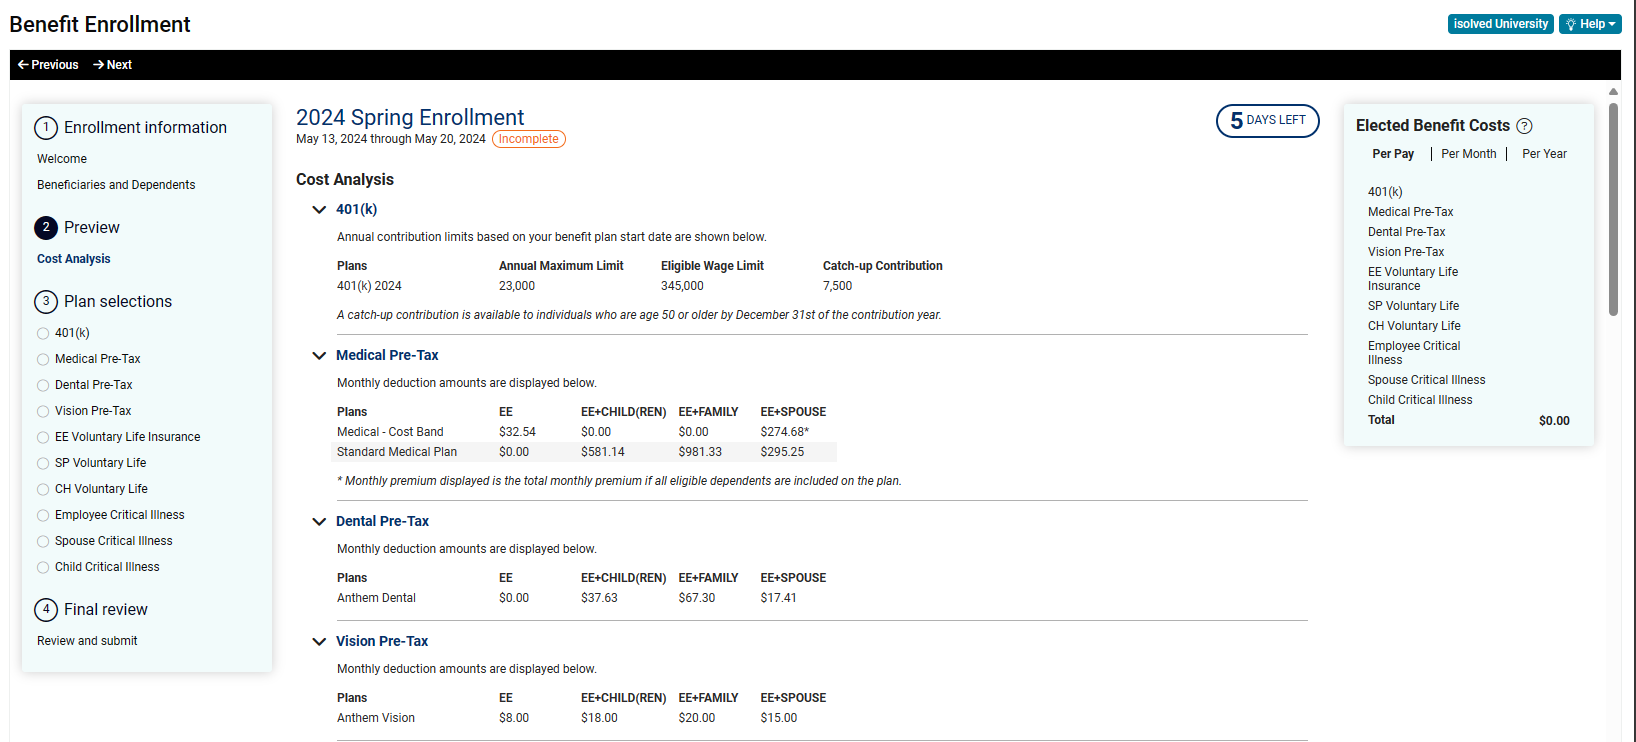
The next screen provides a cost breakdown of all of the benefit plans available in your enrollment. Monthly costs will display for each coverage level for each plan available.
Once you are done reviewing, hit Next to continue.
3. Plan Selections

This section is where you will choose which benefit plans to enroll in. There may be multiple benefit plans available per benefit type. You will only be able to select one benefit plan per benefit type.
Messages containing information on the particular benefit plans can be seen to the right of the plans. There may be documents and web links for you to access in those messages.
3a. Waiving coverage for a benefit type

If the Benefit Type allows you to waive coverage, you will see “Waive Coverage” underneath the last plan. Click the “Waive” button. On the next screen, you can choose the Waive Reason in the drop-down menu. Once you are done click Next.
3b. Selecting a Coverage Level
First, select the Benefit that you wish to sign up for. On the following page, select the appropriate Coverage option. You will notice the Per Pay Amount will adjust based on the coverage level elected.
Should you wish to remove the Plan, click on the Deselect Button. Click Next when completed.
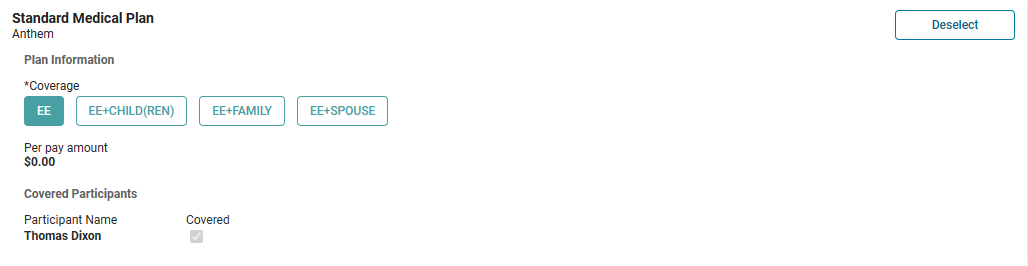
3c. Selecting a Benefit with Dependents

When selecting a Coverage Code that requires a Dependent, you’ll need to check the box next to the covered individuals. If you try to move to the next Benefit Type but have not selected the appropriate number of individuals, you will see a Red warning message. You can either change the coverage code or include the appropriate covered Dependents. If you don’t see the Dependents in the list, go back to the “Beneficiaries and Dependents” screen. Make sure that the “Dependents” box is selected and the appropriate Relationship is connected to the Dependent.
3d. Benefits with Coverage Amounts
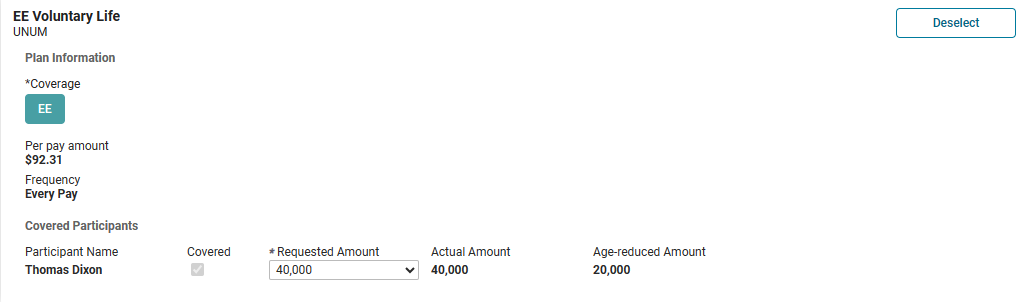
Certain Benefits, such as Voluntary Life Insurance, will have different coverage amounts that you can sign up for. Choose the amount you wish to elect and you will see the Per Pay Amount adjust based on the Amount.
Note: If you are not interested in the benefit, simply hit the Next button or Choose the “Waive Coverage” option if available.
4. Final Review

The Benefits Summary will list out every Benefit Type in the Enrollment, which Plan/ Coverage you elected (or Waived), as well as the Per Pay Costs. You can Print this page as well. Note that the information located in this tab will also be available to you in the Benefits Summary tab of the Payroll Portal.
4a. Submit Benefit Elections
There are two steps on the Confirmation Statement screen that must take place in order for the Status to change to Complete.
The First Step is clicking the Submit My Benefits button

A window will appear asking if you are sure. Click OK

Your Benefits Enrollment is now Complete. You should see that the Enrollment Progress is set to “Complete”.
