Open Enrollment Participant Process - Adaptive
The following steps outline how to complete your Benefits Enrollment using the isolved adaptive view on a mobile device. For participants using the isolved standard view, please follow the steps outlined in the Open Enrollment Participant Process Article.
Beginning your Benefits Enrollment:
To begin the Enrollment Process, log in to your isolved account and click on the 3 Bars in the upper left of the screen.

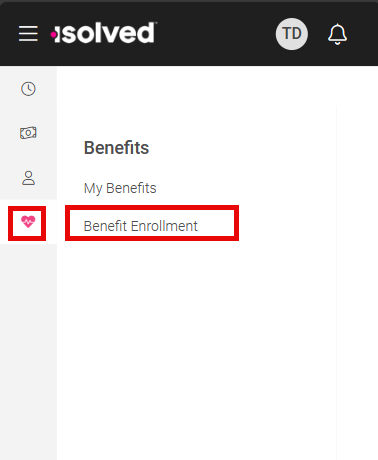
On the next screen, click on the benefits 'heart' icon and then Benefit Enrollment
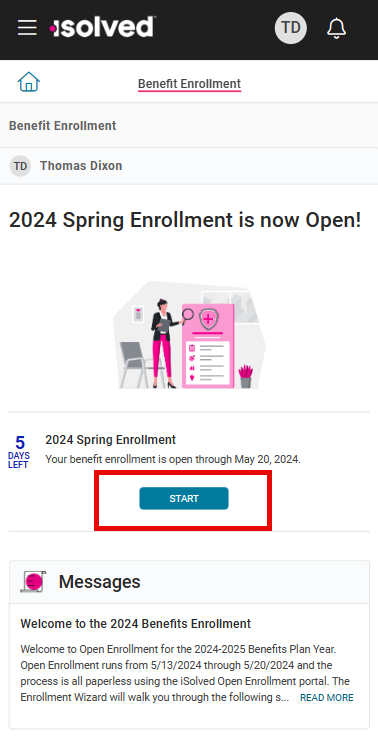
If you are eligible for a Benefits Enrollment, you will see an announcement page that details your current Enrollment window. Select the Start button to begin.
Adding Employee Contacts:
If you need to add any Beneficiaries or Dependents, select the "Beneficiaries and Dependents" option and then either the "Add Beneficiary" or "Add Dependent" button on the screen. You can also edit existing Contacts on this screen as well.

When adding Contacts, make sure to include the proper Relationship and indicate if they are a Dependent, Beneficiary, or both.

*Make sure to scroll down and select the "Save" button after adding or editing each Contact.

Updating Tobacco Use:
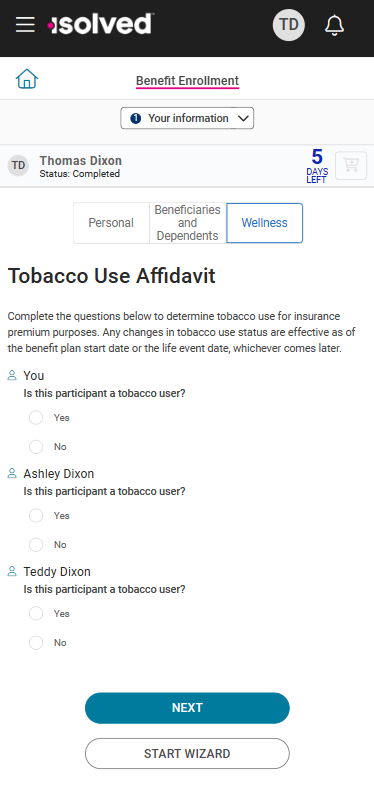
If your benefit plans include rates based on Tobacco use, you may see a "Tobacco Use Affidavit" screen. Select any tobacco users or leave blank and select either the "Next" or "Start Wizard" button.
Selecting Benefit Elections:
The enrollment tool will begin to navigate through the different Benefit Types. If there are multiple plans under a Benefit Type (such as Medical), you will see a cost comparison screen before making an election. Select Next after you have a chance to review.
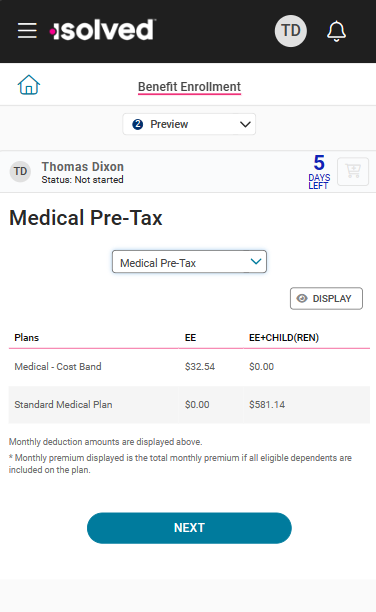
Click the "Select" button next to the plan you wish to enroll in.

On the next screen, you can select the coverage code. Notice that the benefits 'Per Pay Amount' will display as you select a coverage code. Changing between coverage code options will display the change in per pay amount in real time.
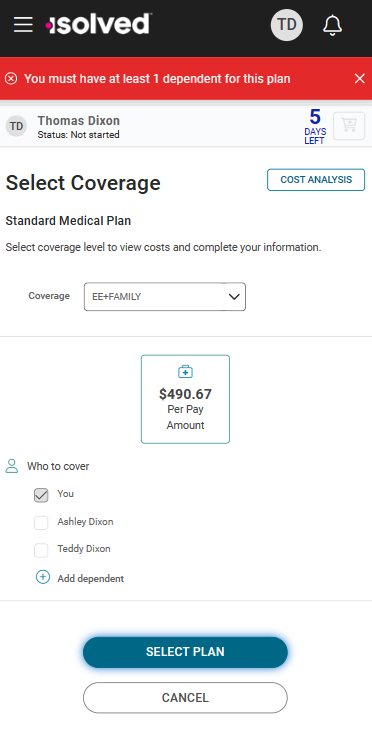
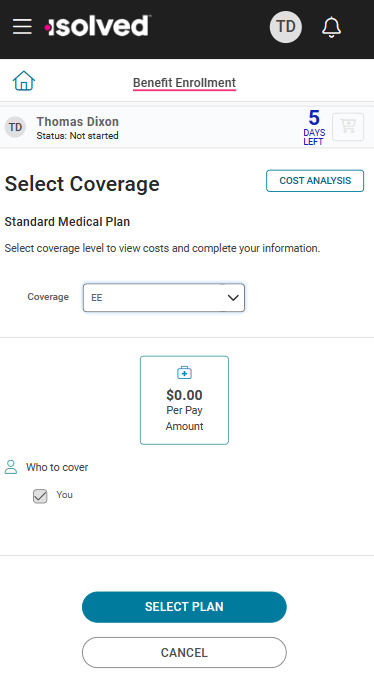 If a coverage code requires a certain number or type of dependents, you will need to select the individuals covered. You will receive an alert if you try to proceed without adding the dependents to the plan.
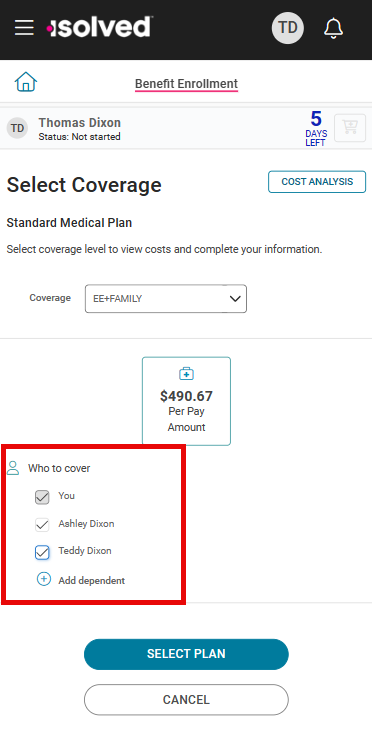
Select the box next to the Dependents that you wish to cover under this Benefit. Click Select Plan when finished.
Waiving Coverage:
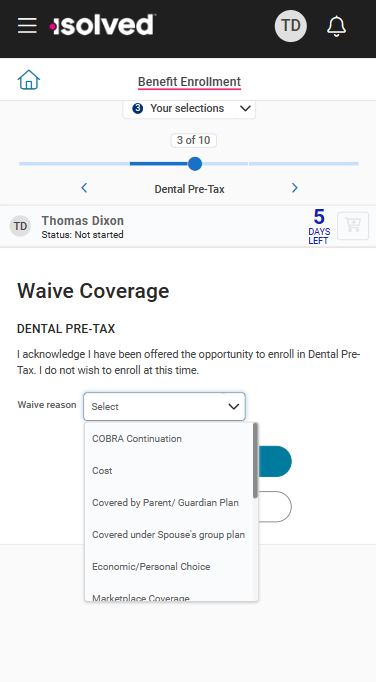
Should you wish to waive coverage for a benefit type, select the Waive box and click Next.

On the next screen, you may use the drop down to select the Waive reason.
Benefits with Coverage Options:
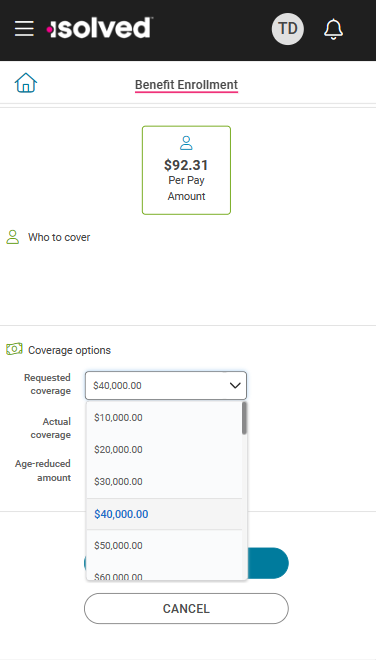
Certain benefit plans, such as Voluntary Life, might contain benefit coverage options versus coverage codes. You will choose the requested coverage amount using the drop-down option on the screen.
Beneficiary Contingencies:
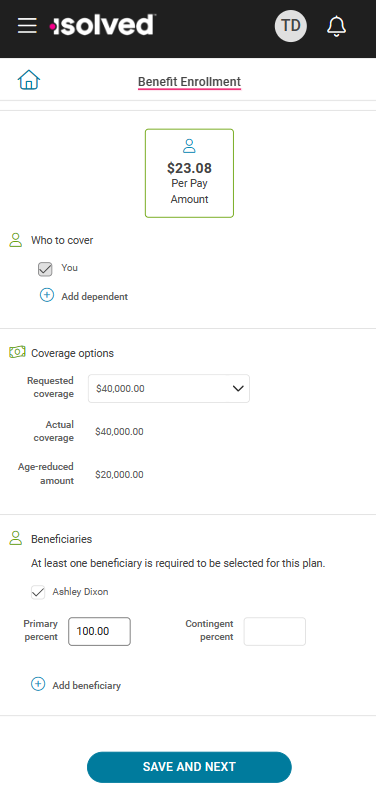
For benefit plans that require Beneficiaries, you will select the box next to the appropriate names and then assign a percent to each record. Note that if you select multiple contacts, the total amount must equal 100% across Beneficiaries. Once the contingencies are entered, click Select Plan.
Cost Comparison and Benefits Review:
Once you have completed your benefit elections, you can review your plans on the Cost Comparison and Review screens.
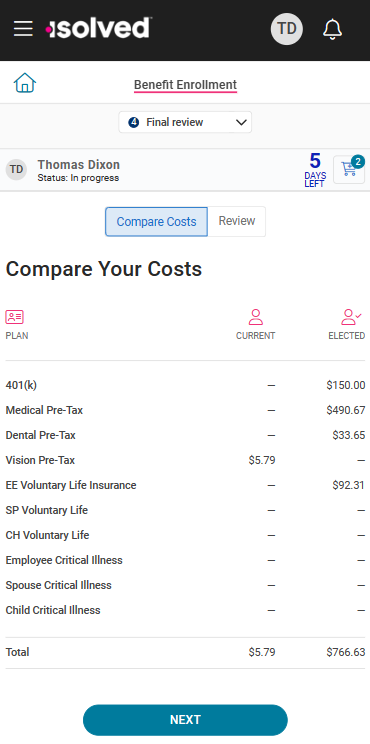
Although the Review screen indicates that Tasks are completed, you still must submit your elections in order to finish the enrollment process. Select Next.

If you are satisfied with your elections, click Submit Benefits
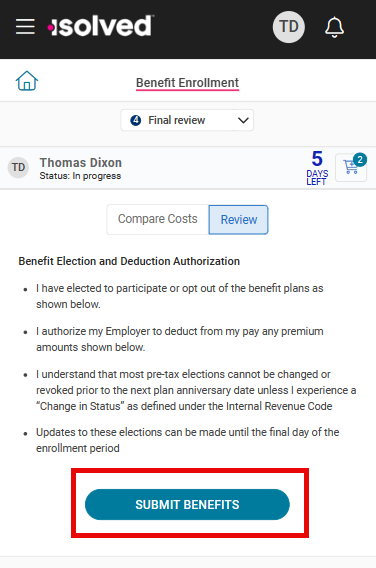
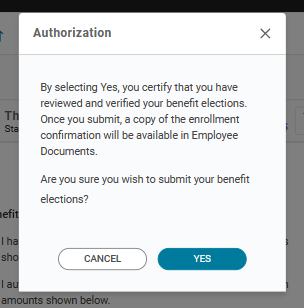
A final alert will appear. Select Yes to confirm that you wish to submit your elections.
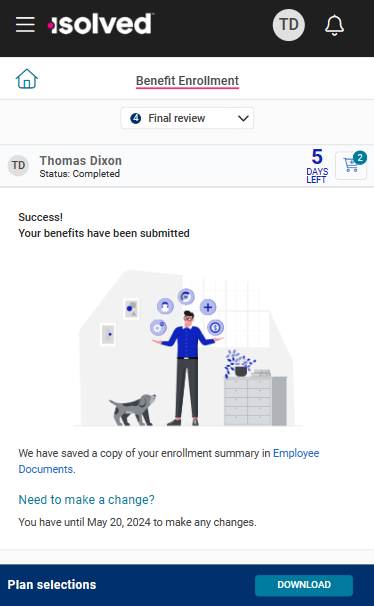
You are finished when you see the screen below and your "Status" under your name shows as "Completed". Should you wish to download a summary of your elections, you can select the Download button at the bottom of the screen. At this point, you can navigate out of Benefits Enrollment by selecting the Home icon or the 3 bars in the upper left of the screen.
